


25
JunExplained : Routing in Blazor
02 Aug 2025
Intermediate
47.4K Views
7 min read

Learn with an interactive course and practical hands-on labs
Free ASP.NET Core Online Course with Certificate - Start Now
Routing is a key aspect of any web application. It is the mechanism which makes sure that the client request reaches the correct piece of code which is written to handle that specific request. In other terms we can say, routing is the process via which requests are routed to the relevant code as defined in the route.
Router & Route template
The routing process is usually carried out by a router and Blazor is equipped with a client-side router. The <router> component is responsible for the routing task and is used by the root component in App.cshtml file, available for configuring.
 <!--
 Configuring this here is temporary. Later we'll move the app config into Program.cs, and it won't be necessary to specify AppAssembly.
 -->
 <Router AppAssembly=typeof(Program).Assembly />
RouteAttribute (Microsoft.AspNetCore.Blazor.Components.RouteAttribute) defines a route template and can be used in two ways i.e, using @Page directive for the cshtml pages and using attributes in components which are written in pure C# . To see a simple example of routing, open the Counter.cshtml page of the application you might have created in the previous tutorial. It starts with a @page directive i.e,
@page "/counter"
The above @page directive is required if user request needs to be routed to any page. So, any request to “/counter” will be served by the Counter component written in the Counter.cshtml page. Components written in pure C# may use attribute for defining the route template in the following manner.
[RouteAttribute("/CounterBusiness")]
Steps to configure Routing
As described above, routing can be configured in two ways based on the type of components. However, Blazor internally converts @page directives to the RouteAttribute equivalent. Let’s create a simple page in our existing HelloWorld application which we had created in our first Blazor tutorial. If you haven’t had a chance to look at the earlier articles on Blazor in this series, please check the following links:
Understanding Web Assembly and Blazor
Blazor Data Binding: One-way, Two-way and Event Binding
Those who are using Visual Studio Code, I would suggest installing the following optional plugins.
C# (Microsoft)
Blazor snippets
Code Runner
C# Extensions
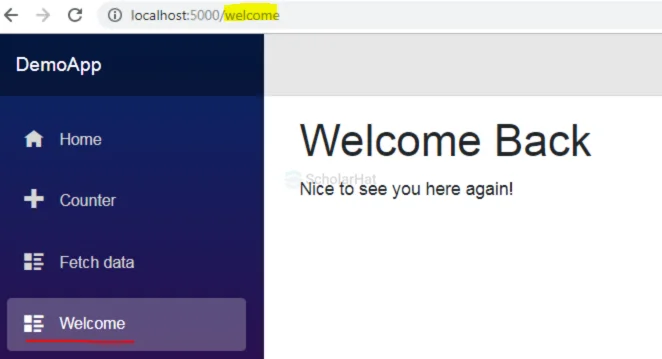
So, let’s create a simple .cshtml page in Pages folder. Name it WelcomeBack.cshtml add following content.
 @page "/welcome"
 <h1>Welcome Back</h1>
 <p>Nice to see you here again! </p>
If you run the application and navigate to,http://localhost:5000/welcome you should see the following.

It is also possible to define multiple routes for a single component. So, the same component will be accessed via all the defined routes in that particular component. In the above just another route as follows:
 @page "/welcome"
 @page "/welcome-back"
 <h1>Welcome Back </h1>
 <p>Nice to see you here again! </p>
Navigating to any of the route http://localhost:5000/welcome or http://localhost:5000/welcome-back will land you on the same page.
Dealing with Parameters
Route parameters help in sending a parameter to the components while they are being accessed. The parameters are defined in the route template enclosed in a pair of curly brackets as in the following example:
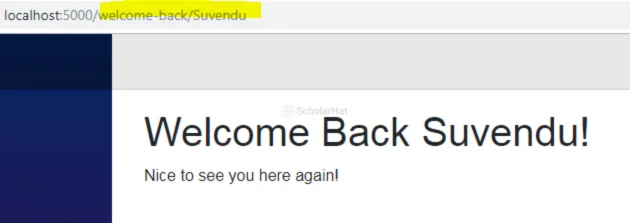
@page "/welcome-back/{yourname}"
Now, we need something to capture the incoming value as the parameter. In Blazor, it needs a property with the same name as the parameter defined in the route template. It automatically assigns the value to the property. It is, however, case insensitive. We need to add an [Parameter] attribute to the property. Here is a more complete example of a route with the parameter.
 @page "/welcome"
 @page "/welcome-back/{yourname}"

 <h1>Welcome Back @yourname </h1>
 <p>Nice to see you here again! </p>

 @functions{
 private string _yourname;

 [Parameter]
 private string yourname
 {
 get {
 return _yourname==null ? string.Empty : _yourname +"!";
 }
 set { _yourname = value;}
 }
 }
Output
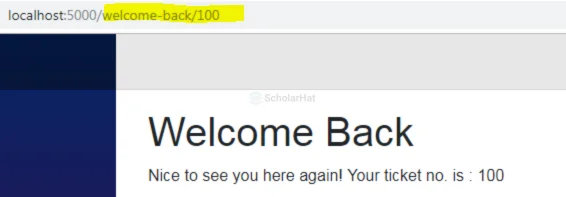
However, if you change the data type of the property to anything other than string, it will not work. It will give an error like:Error: System.InvalidOperationException: Unable to set property 'ticket' on object of type 'DemoApp.Pages.WelcomeBack'. The error was: Specified cast is not valid. ---> System.InvalidCastException: Specified cast is not valid. For working with parameters of other data types, we need to use rout constraint. We have to mention it explicitly using a colon separator between the parameter name and the type.
@page "/welcome-back/{ticket:int}"
Example @page "/welcome"
@page "/welcome-back/{ticket:int}"
<h1>Welcome Back</h1>
<p>Nice to see you here again! Your ticket no. is : @ticket</p>
@functions{
[Parameter]
private int ticket { get; set;}
}
Output
Blazor supports the following route constrains – bool, datetime, decimal, double, float, guid, int, long.
Navigating using Link
The most common element used by web developers is anchor i.e <a> tag. Let’s add a link to our newly created page from the navigation section. To do that, open NavMenu.cshtml from the Shared folder and add a new list item to the unordered list.
 <li class="nav-item px-3">
 <a class="nav-link" href="/welcome">
 <span class="oi oi-list-rich" aria-hidden="true"> </span> Welcome
 </a>
 </li>
Output

Now, build and run the application again to see the changes. Notice one thing, when you are clicking on the link, the page doesn’t reload. If you open the source of the rendered page, you will see a base element is added automatically.
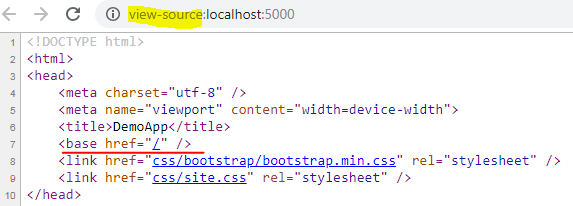
This is the cause why all the relative links do not reload as these are handled by the Blazor router on the client side itself.
You can also use NavLink component instead of<a> tags. NavLinks serve the same purpose but additionally able to set active CSS if it is the current URL. In the previous example if you have noticed, when we click on the Welcome link the active CSS is not applied automatically. Let’s change the newly created list item to use NavLink component in place of <a> element.
 <li class="nav-item px-3">
 <NavLink class="nav-link" href="Welcome">
 <span class="oi oi-list-rich" aria-hidden="true"></span> Welcome
 </NavLink>
 </li>
Output
Navigating from the code
You can also navigate to another component from the code with the help of IUriHelper service. Let’s create another component to demonstrate this. We need to inject the IUriHelper service using @inject directive.
 @page "/temp-welcome"
 @inject Microsoft.AspNetCore.Blazor.Services.IUriHelper UriHelper

 <button onclick=@TakeMeToWelcome>Take me to the Welcome page</button>

 @functions {
 private void TakeMeToWelcome()
 {
 UriHelper.NavigateTo("/welcome");
 }
 }
Output

Summary
In this article of the Blazor series, we learned how routing works in Blazor. While routing in Blazor is still limited as compared to other client-side frameworks, it is expected to have more features in the coming days. However, as we saw, you can still build basic web apps without any issues.