


18
JunBuilding a Microservice with ASP.NET Core
29 Aug 2025
Intermediate
32.2K Views
12 min read

Learn with an interactive course and practical hands-on labs
Free .NET Microservices Online Course - Beginners Start Here
Microservices has distributed systems features, lifecycle management, independent scaling of services, rolling upgrades of applications, and always-on availability, and it also supports stateless and stateful services. It’s a Windows component.
In this Microservices tutorial, we are going to create a Microservice using Azure Service FabricApplication with an ASP.NET Core Web API in Visual Studio.
Enrolling in .NET Microservices course and Microservices Certification Free can help you gain a deeper understanding of these concepts and provide hands-on experience in building scalable microservices applications using .NET technologies.
What is Microservice?
- The word "microservices" refers to a type of software development.
- It has evolved from modern trends to established procedures designed to boost the productivity and efficiency of creating and maintaining software solutions at scale.
- Applying certain architectural patterns and concepts is more the focus of microservices architecture.
- Although each microservice operates separately, they are all dependent upon one another.
- Within a project, every microservice is independently deployed and coexists side by side in production at their own speed, on-premise in the cloud.
Architecture of Microservices
A microservices architecture consists of more than just the microservices themselves.
- Management: It maintains the service's nodes.
- Identity Provider: oversees identification data and offers authentication services across a dispersed network.
- Service Discovery: It maintains track of services, endpoints, and service addresses.
- API Gateway: It acts as a point of entry for clients. Client-side single point of contact that receives responses from underlying microservices and, occasionally, aggregates responses from several underlying microservices.
- CDN(Content Delivery Network): It distributes static resources across a distributed network, such as pages and web content.
- StaticContent: Web content and pages are examples of static Content.
Building a Microservice with ASP.NET Core
Now, Let's create an Azure Service Fabric Application with an ASP.NET Core Web API in Visual Studio.
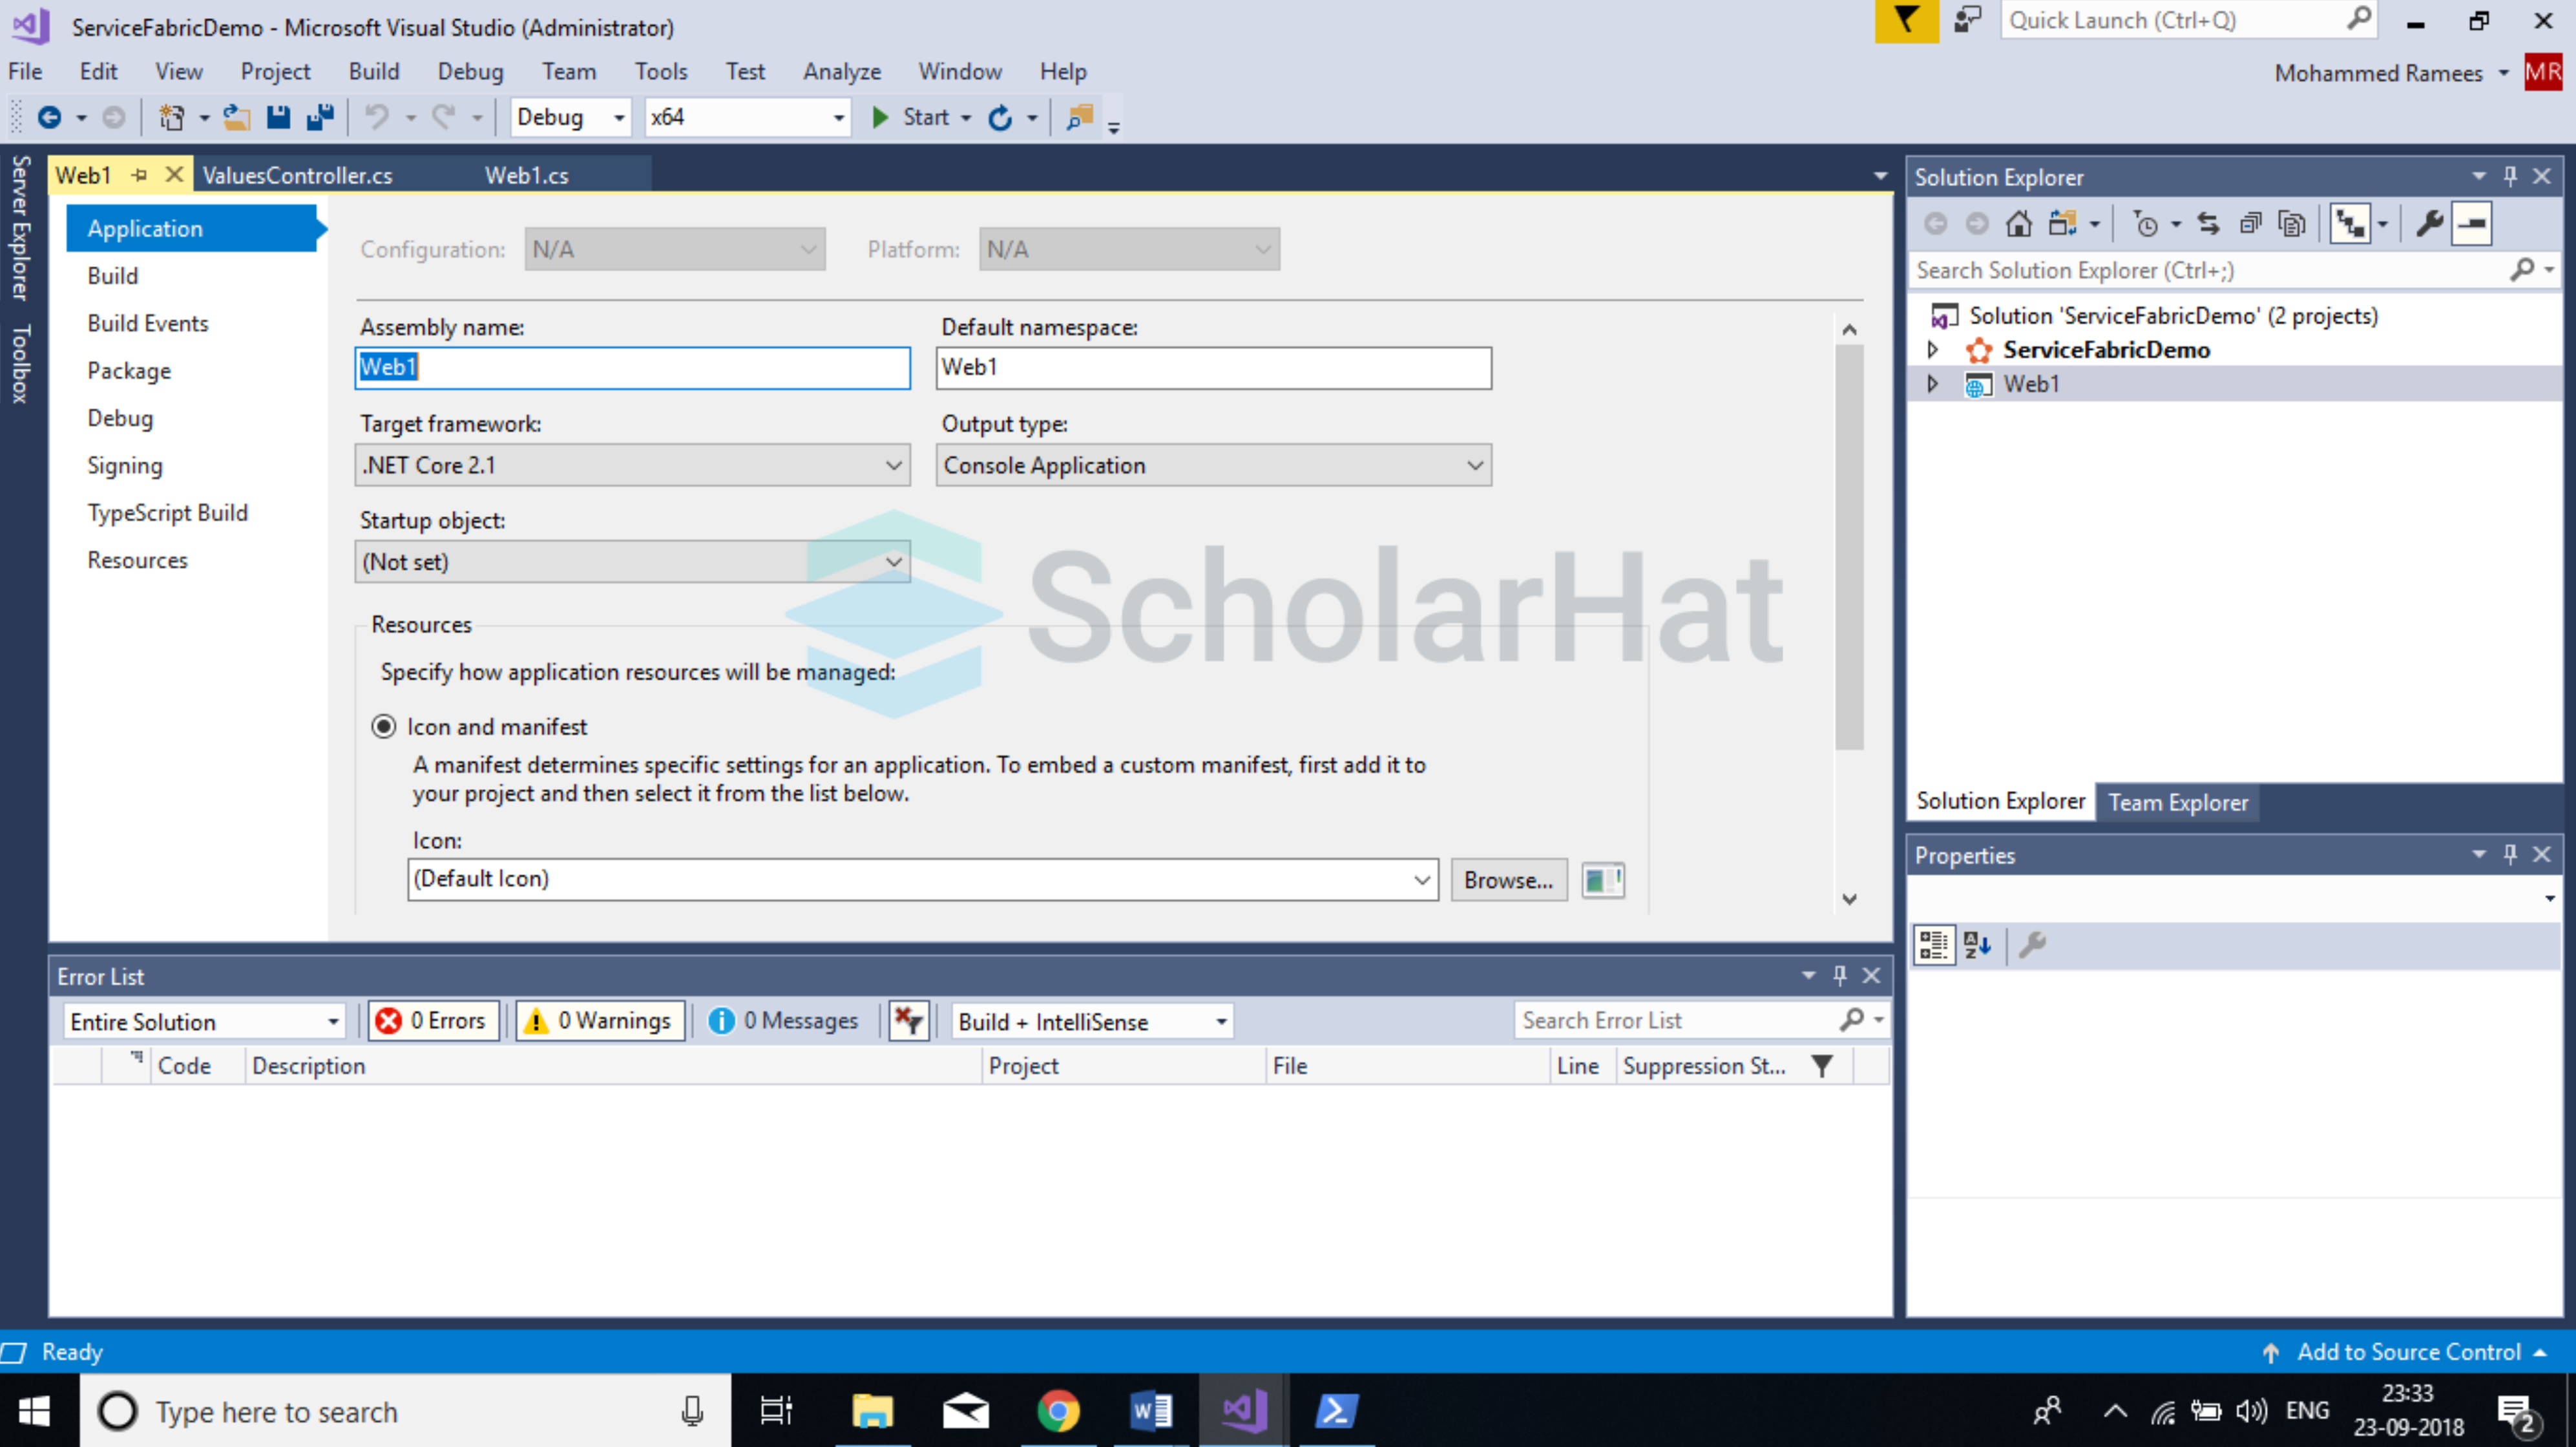
1. Setting Up Dev Environment
Install Visual Studio 2017 with Azure Development, ASP.NET, and web development workloads.
Install the Microsoft Azure Service Fabric SDK.
Open PowerShell in administrator mode and run the following command to enable Visual Studio to deploy to the local Service Fabric.
cluster:powershell Set-ExecutionPolicy -ExecutionPolicy Unrestricted -Force -Scope CurrentUser
2. Creating Microservice Using Azure Service Fabric
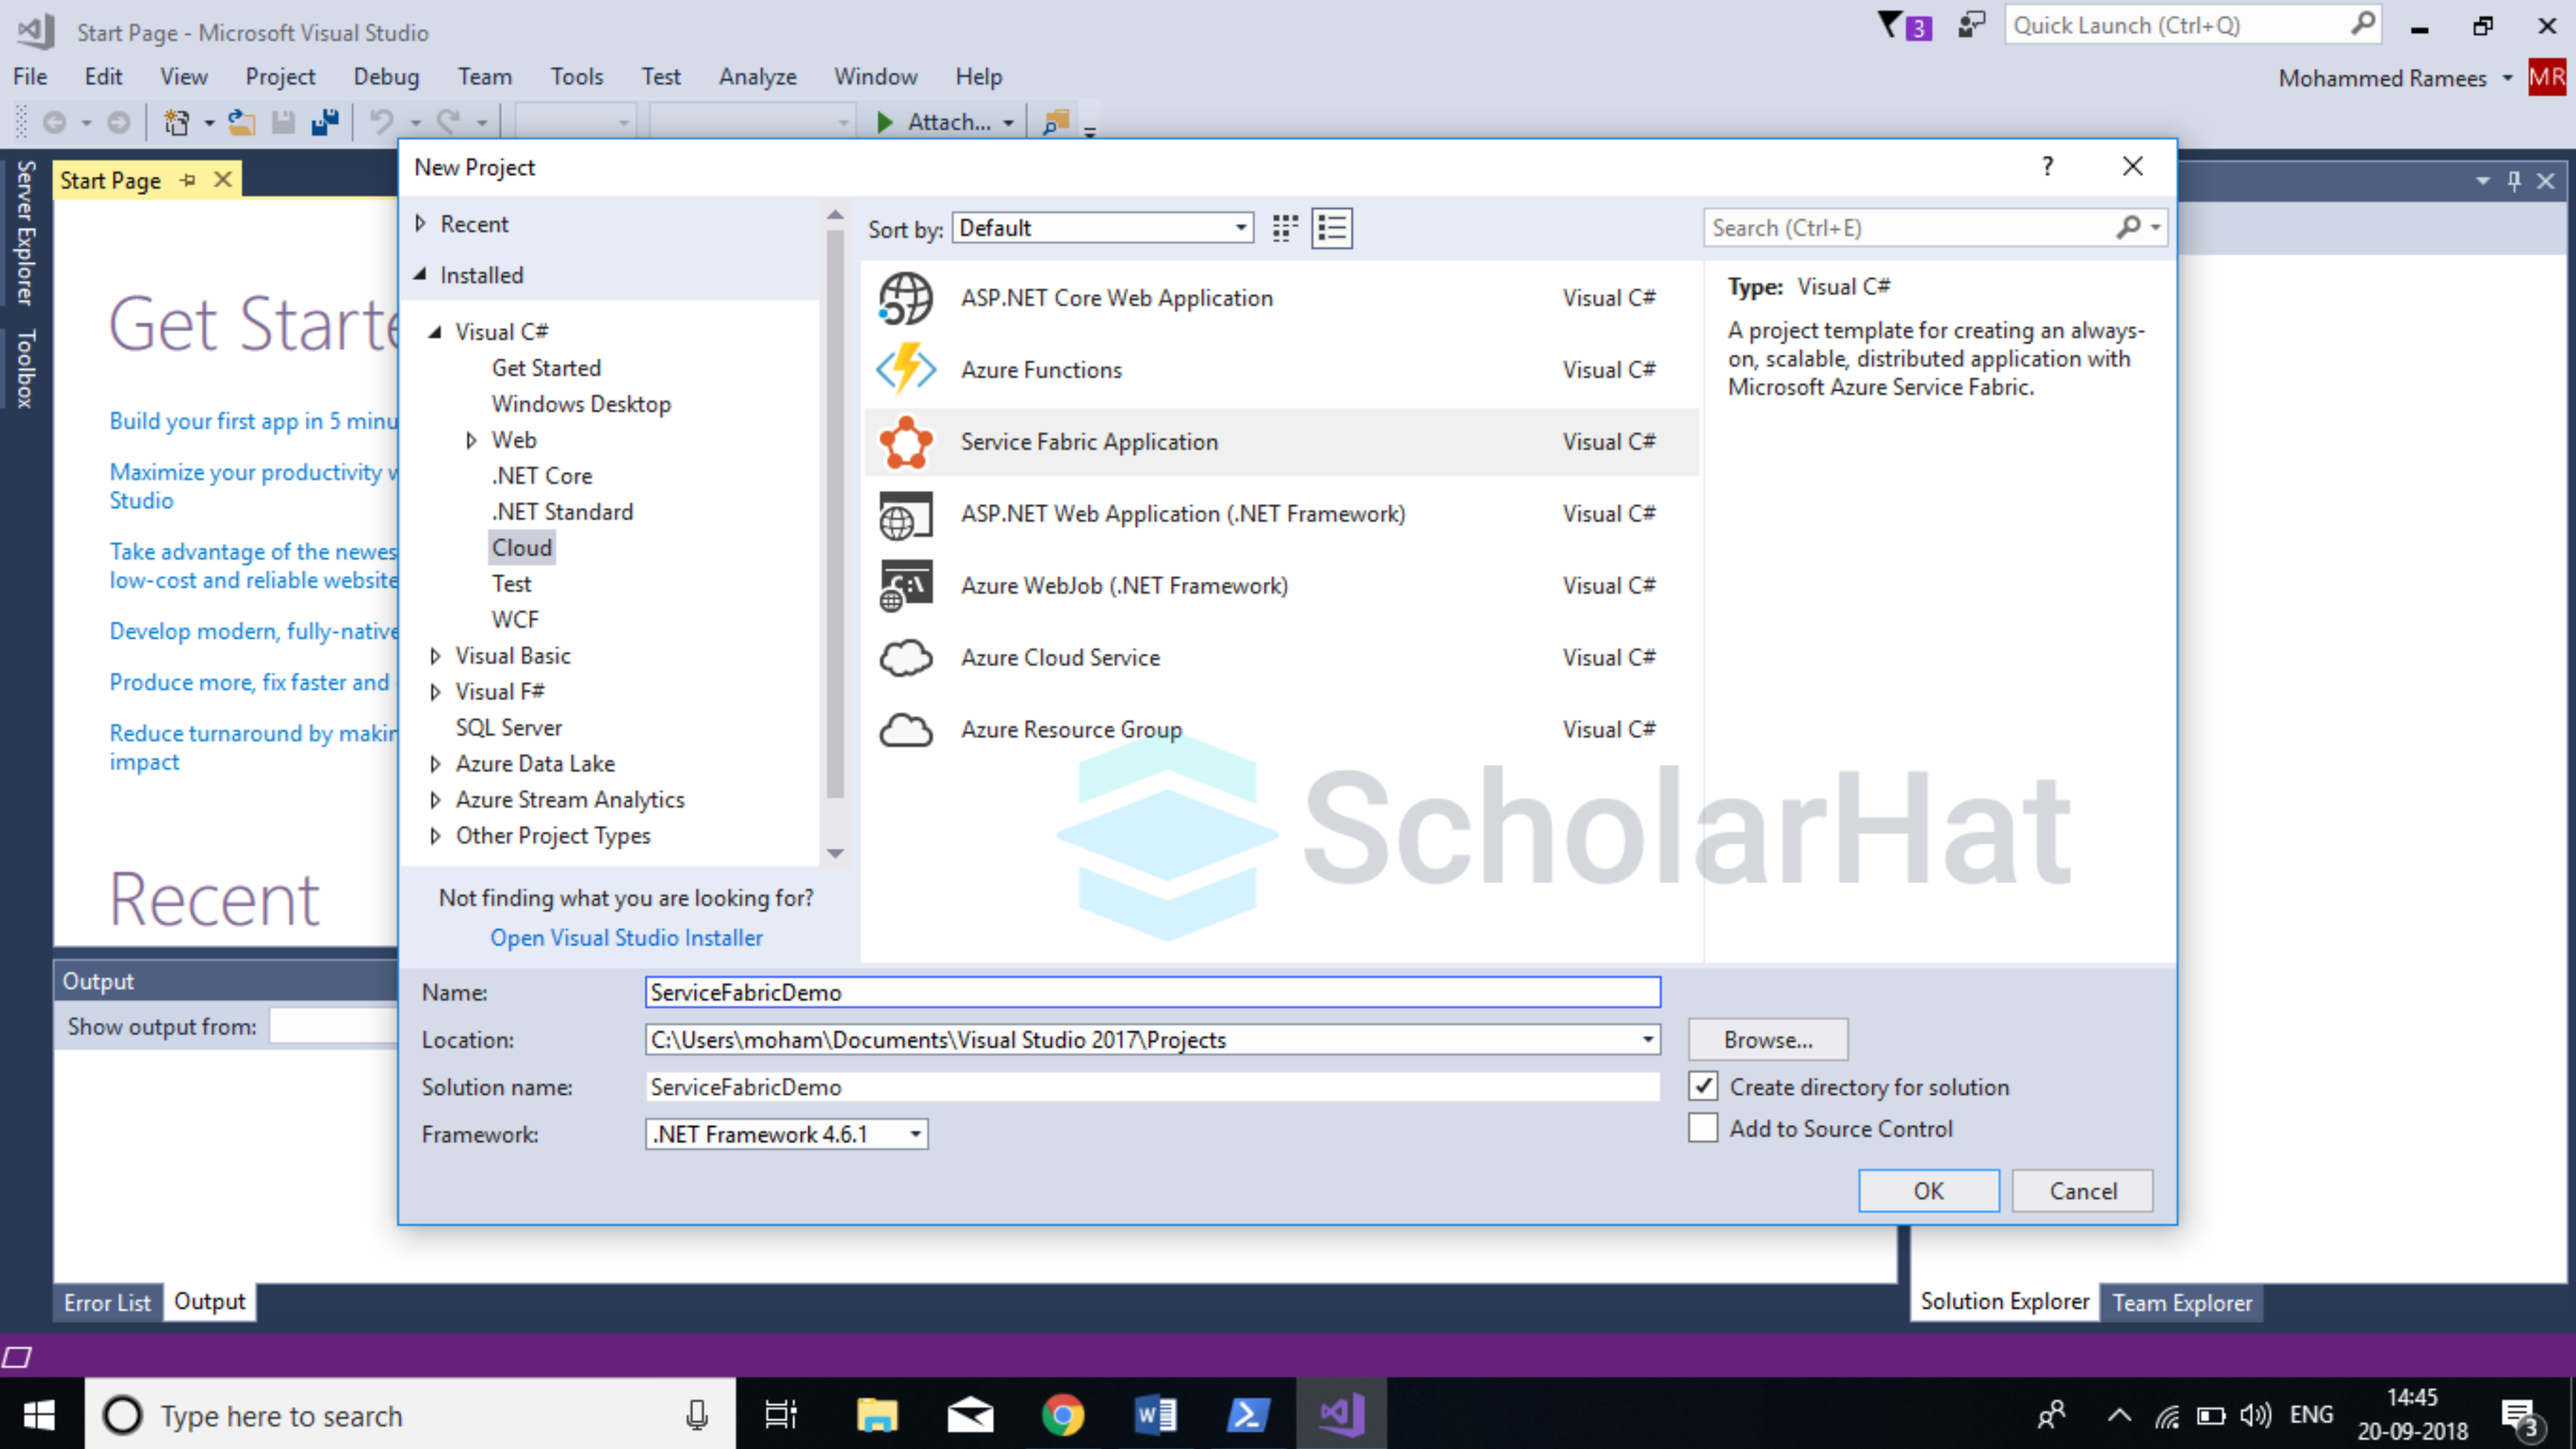
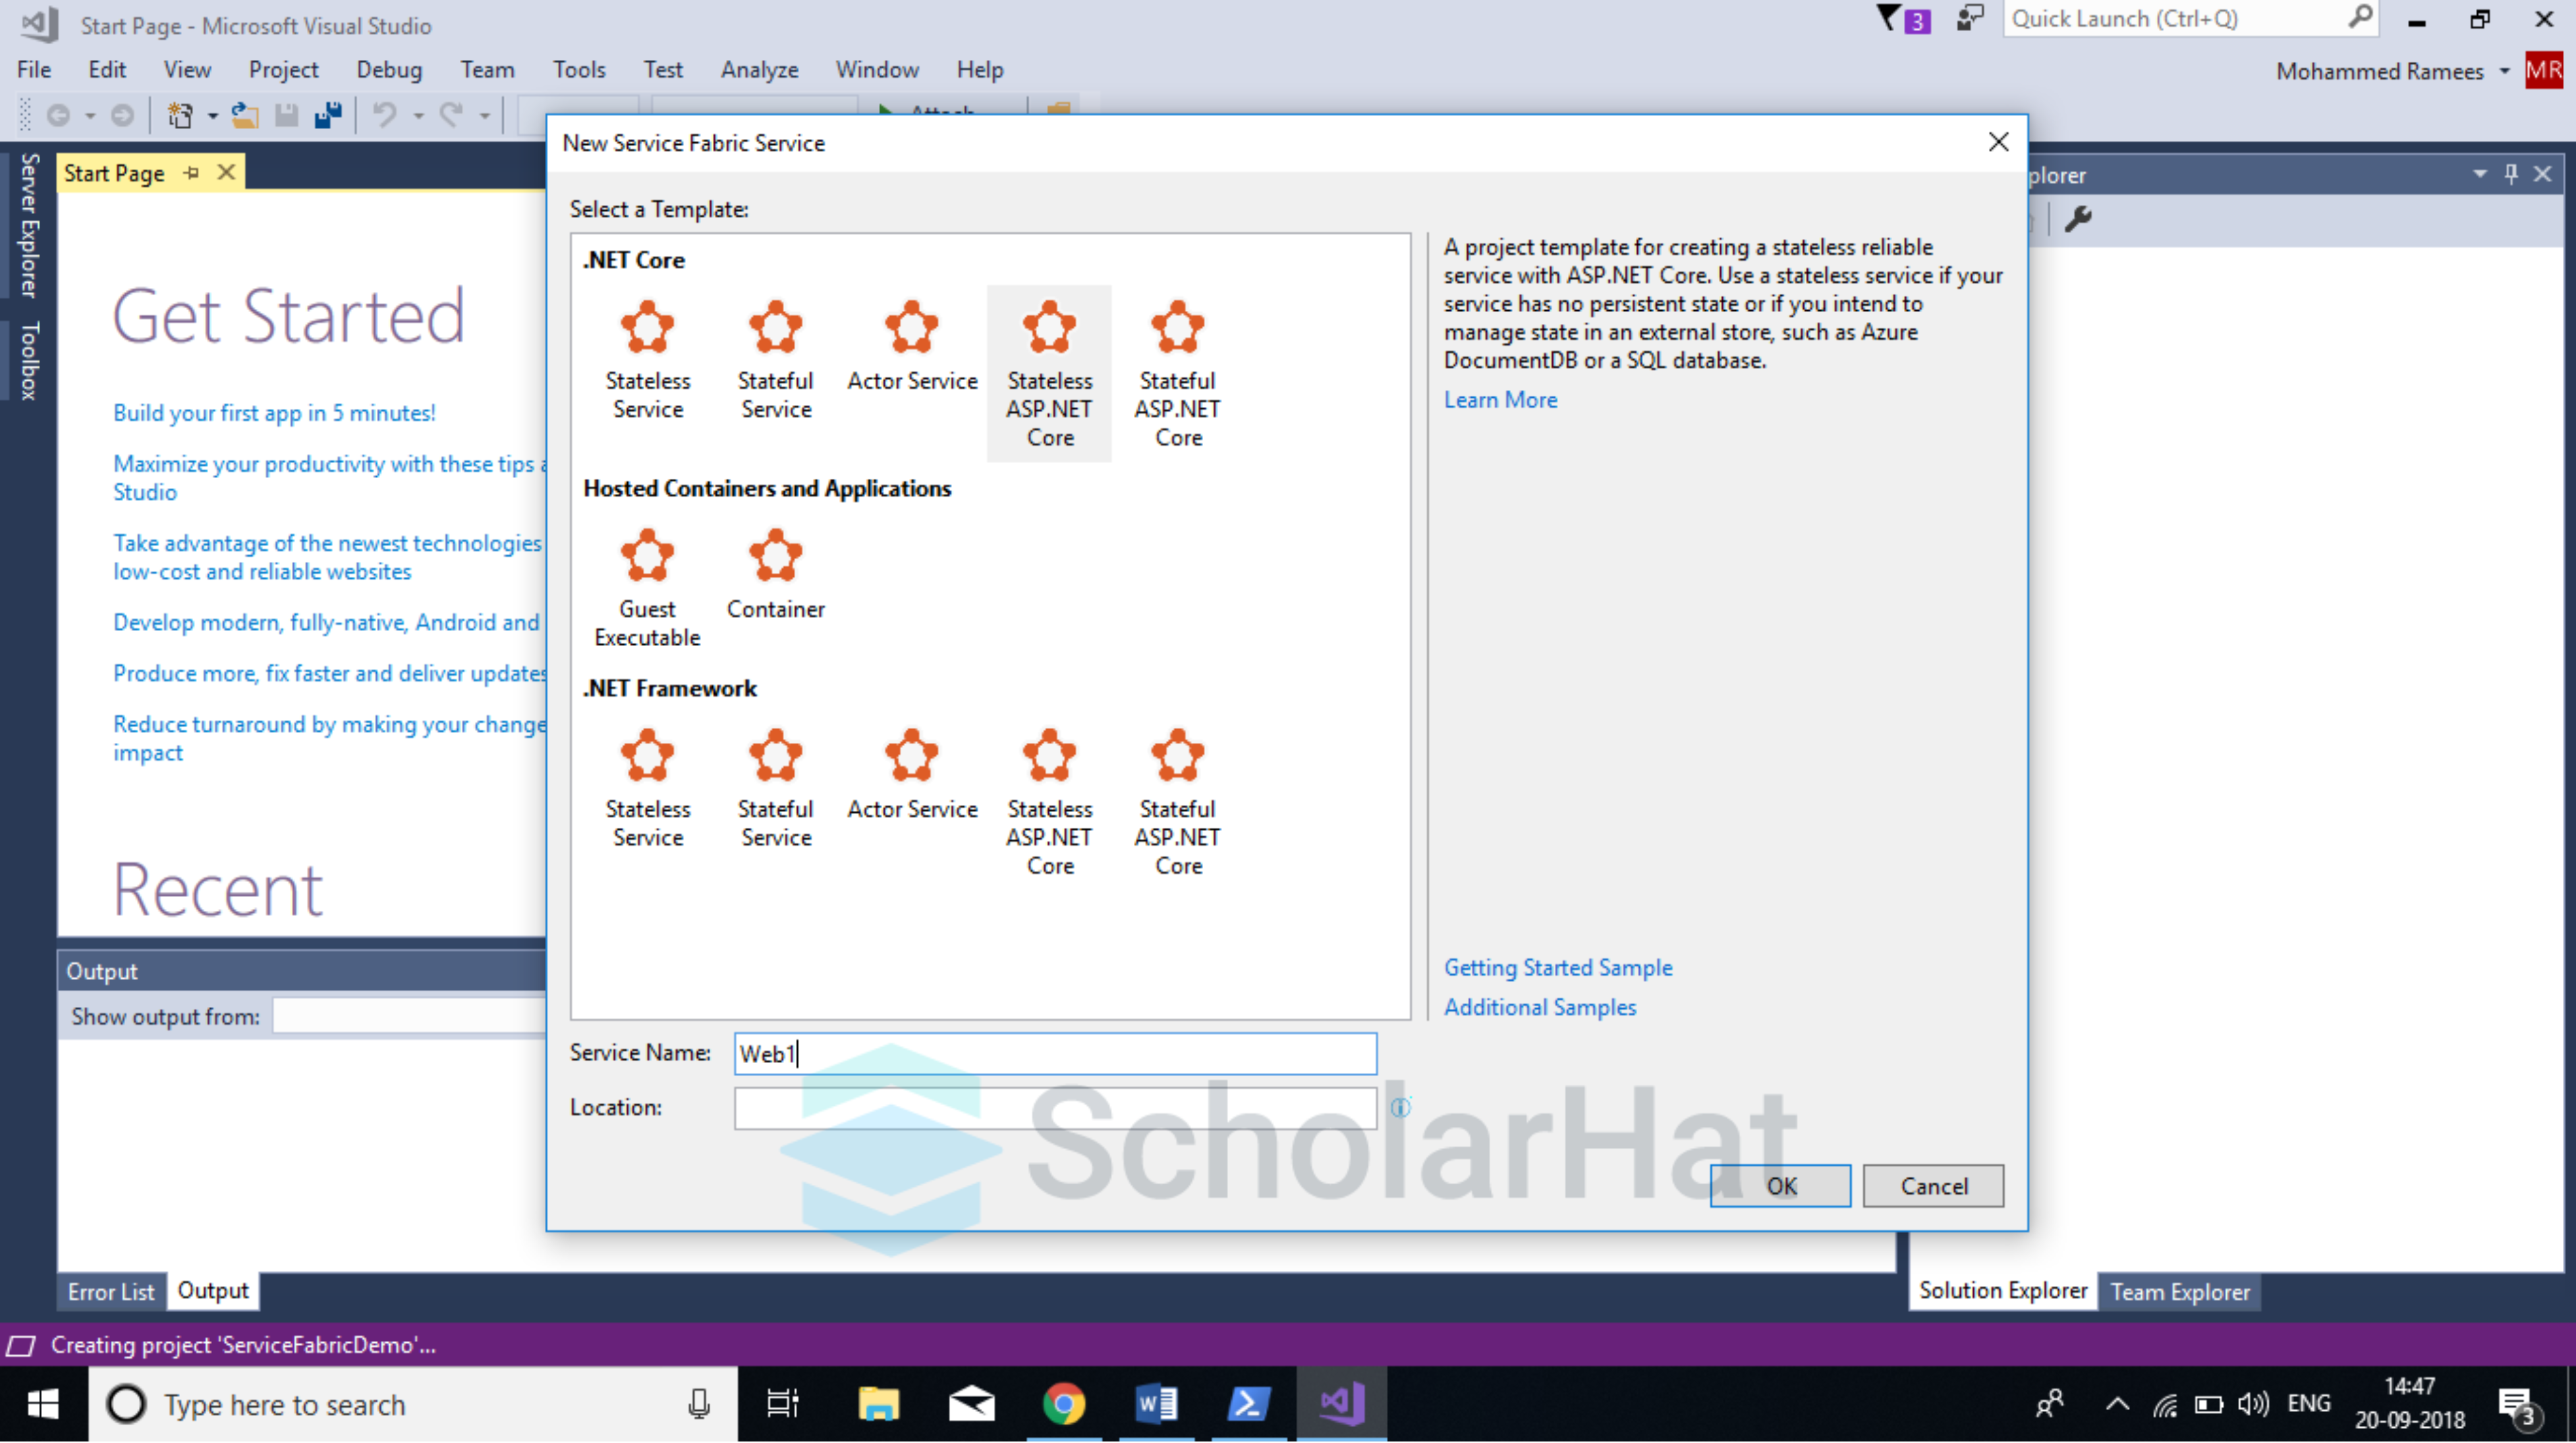
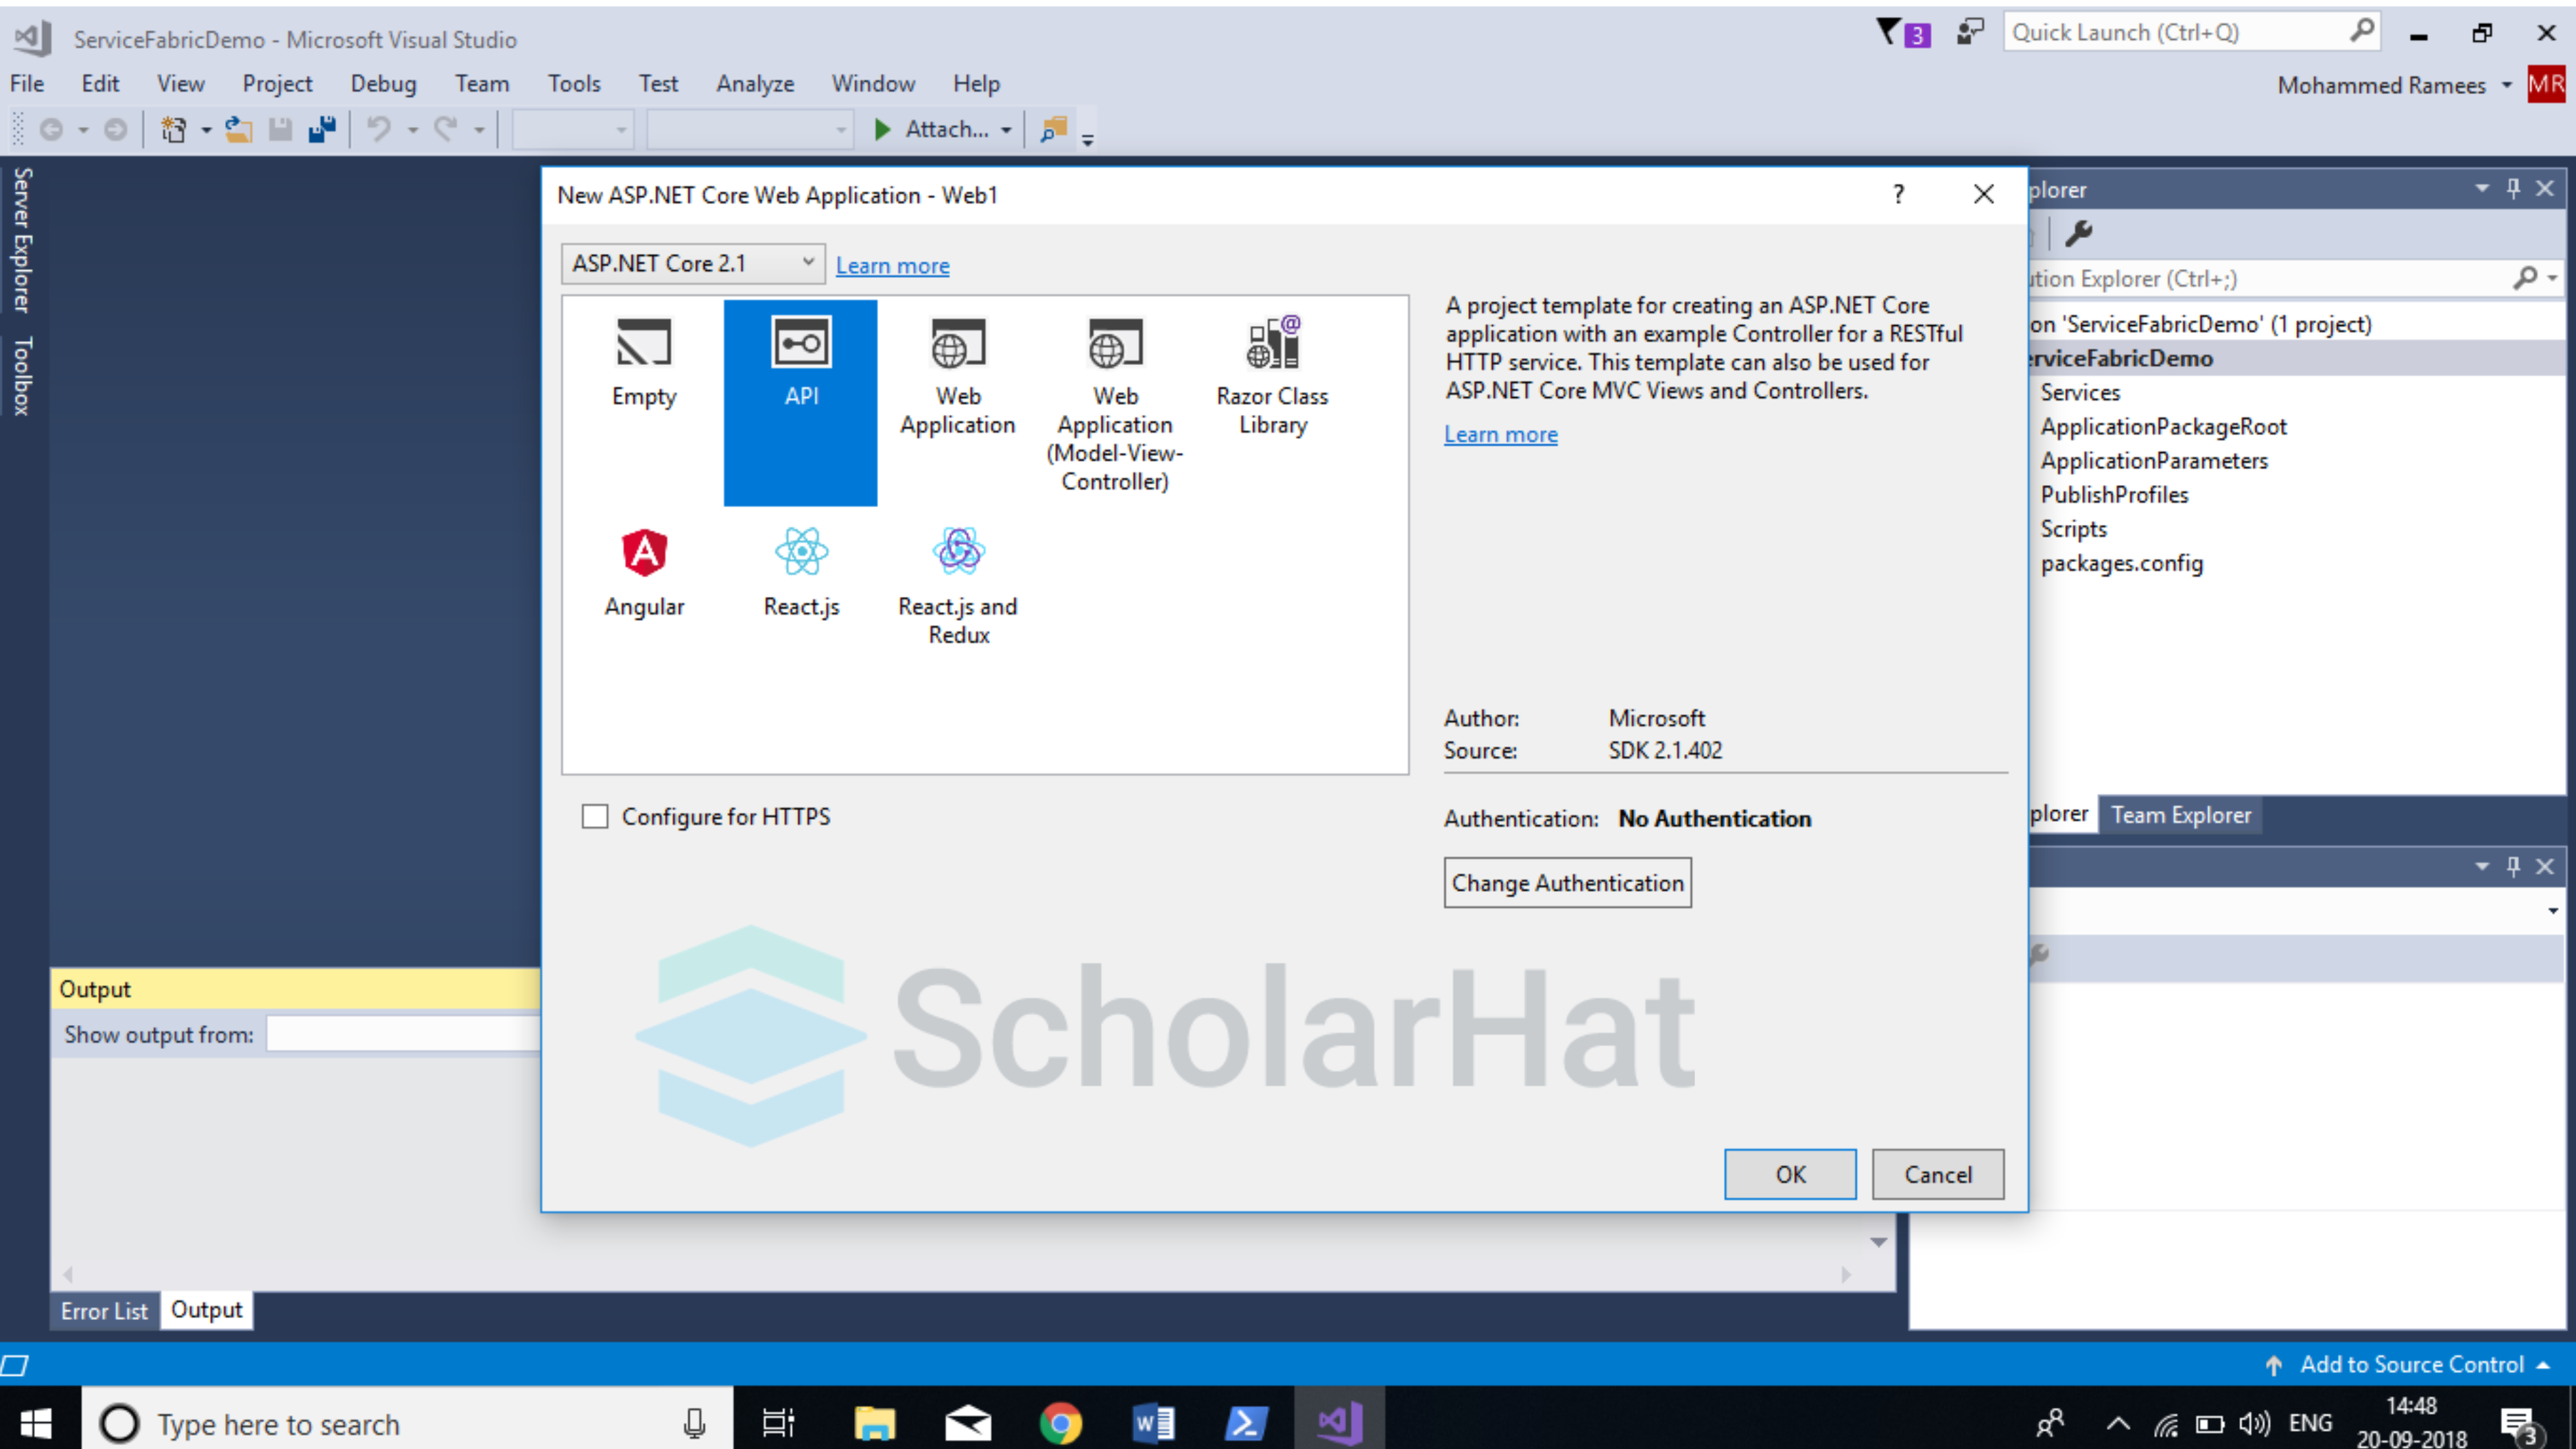

3. Azure Service Fabric Local Cluster
The Azure Service Fabric Local Cluster gets shipped with the Service Fabric SDK and you can get it installed on your local machine. You can run your local cluster from the taskbar. Right-clicking the icon will open the context menu with the following options.
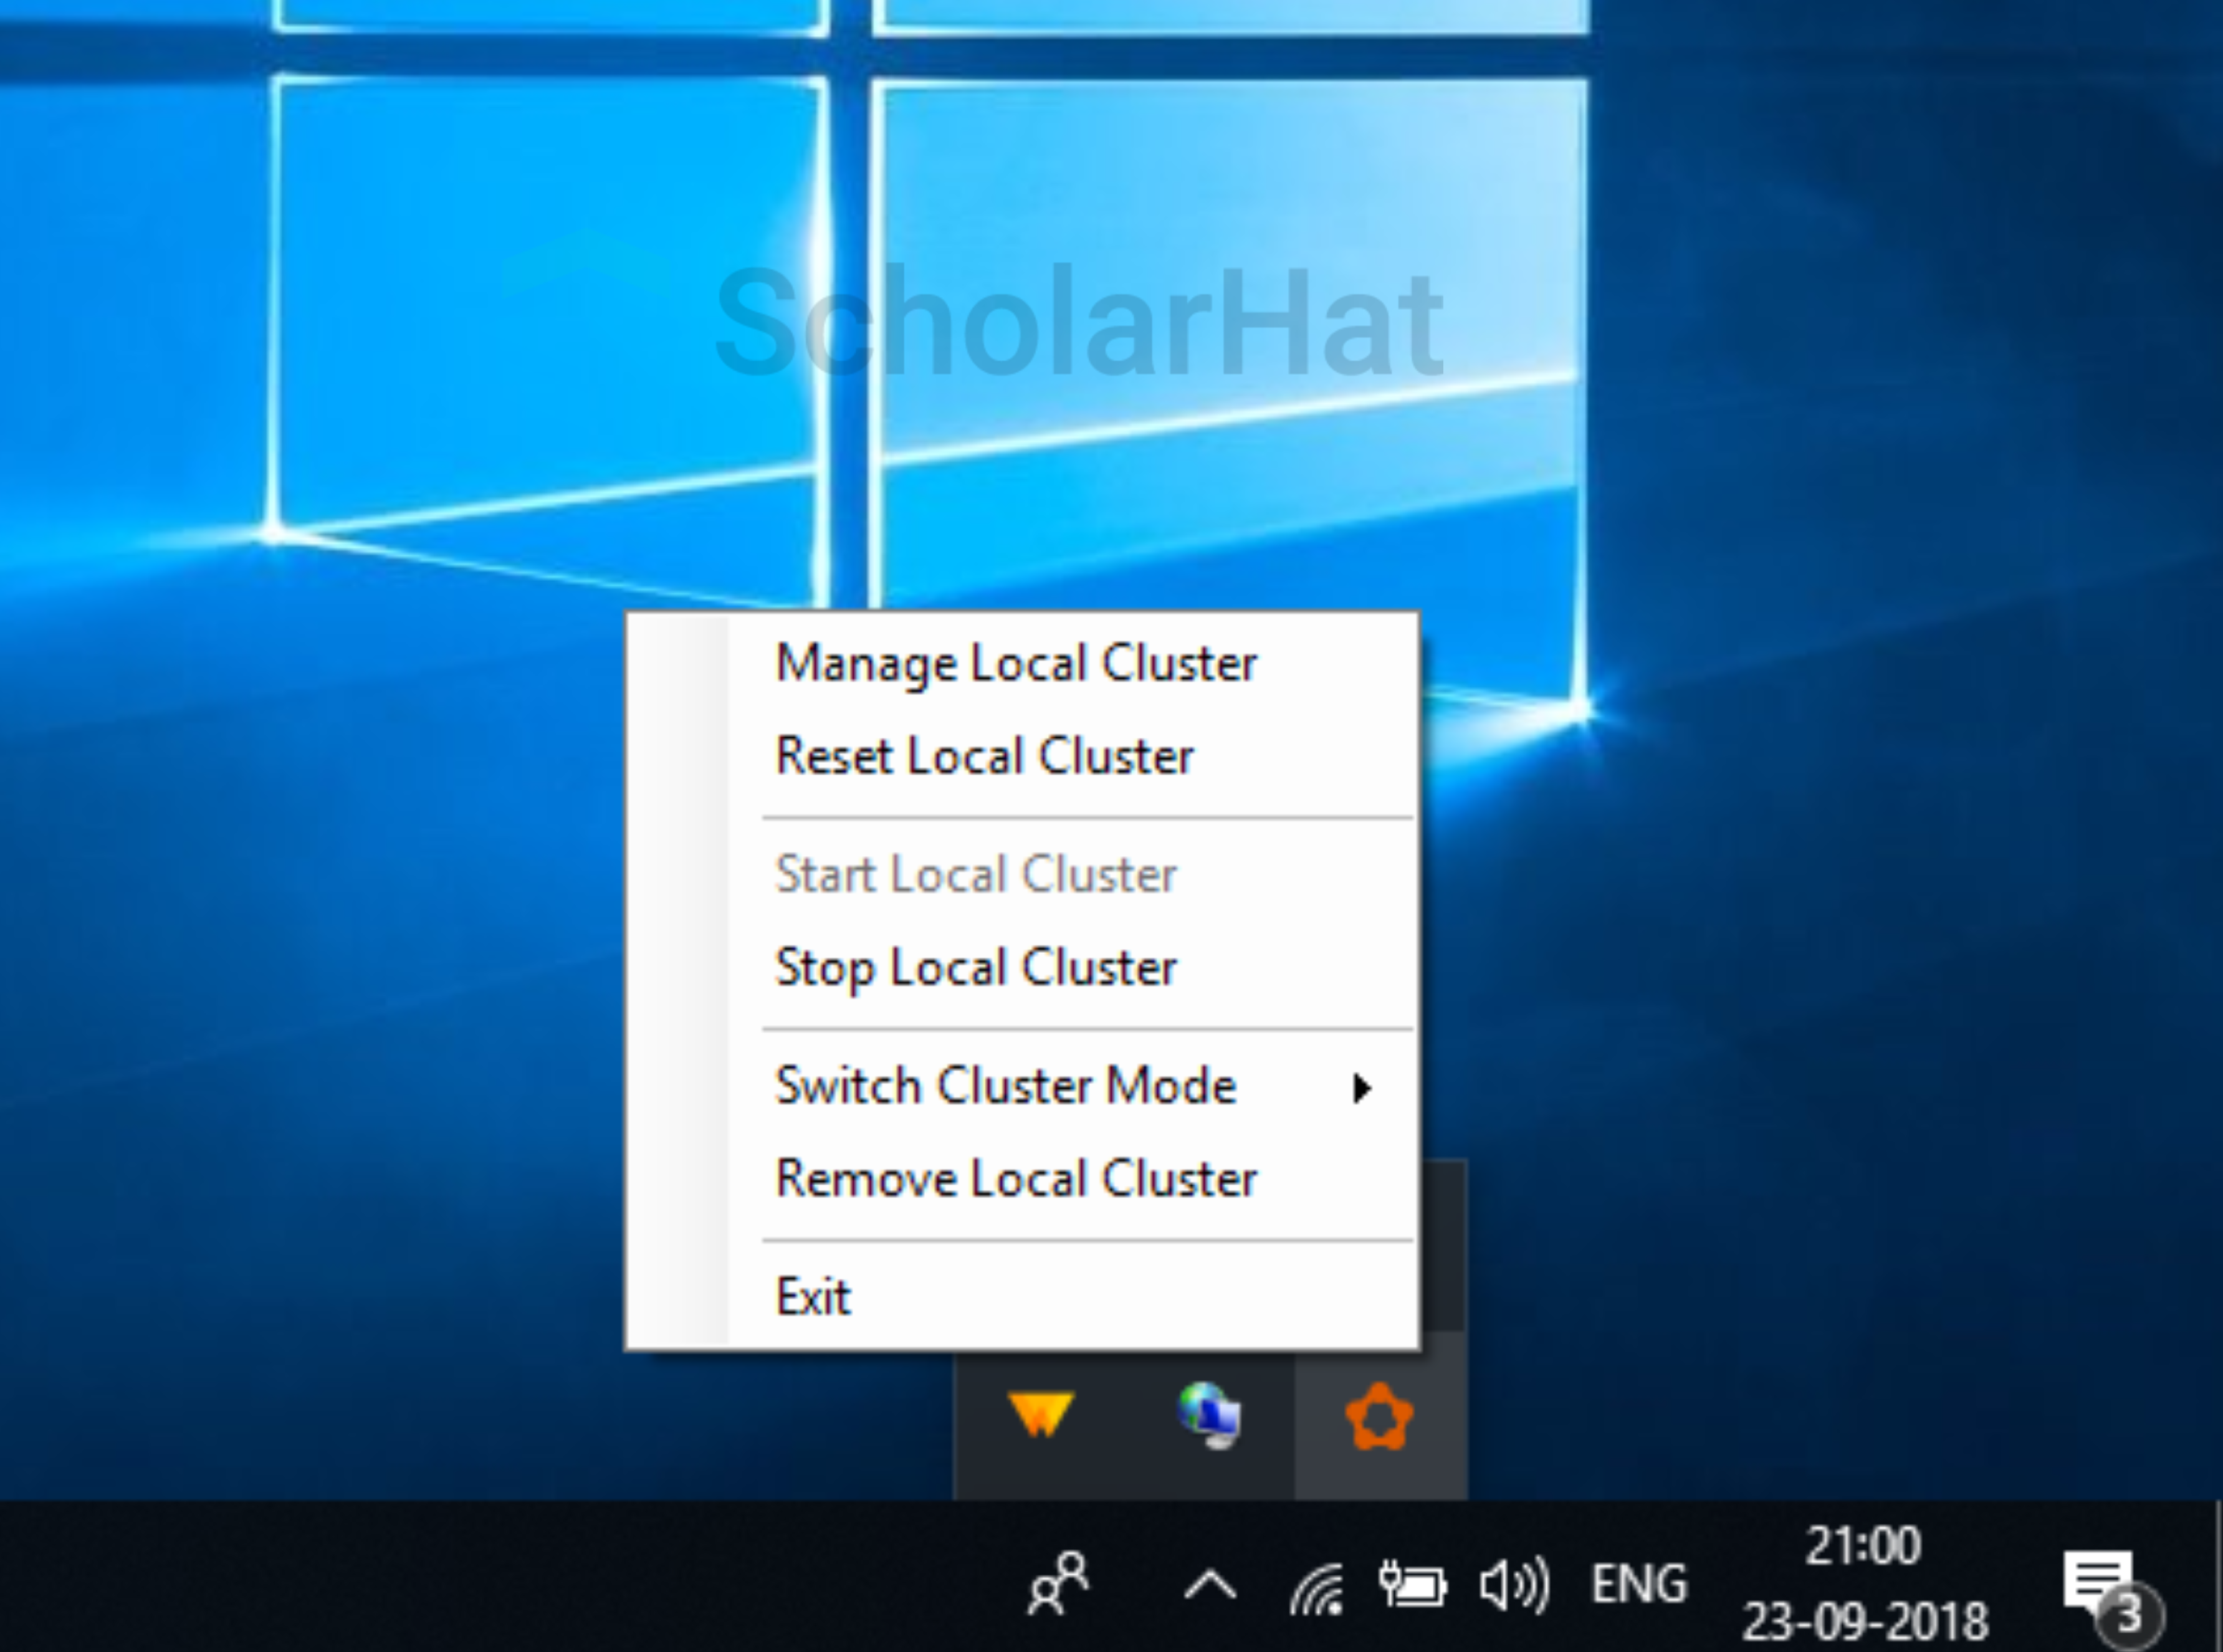
- Exit: Removes the icon of the tray. It won’t kill the actual local cluster, it just kills that utility.
- Remove Local Cluster: Remove all the files for the local cluster from your hard disk and clean up the hard disk space.
- Switch Cluster Mode: By default, the services of the local cluster will be running on one node. Using this option, you can make it run on 5 nodes.
- Stop Local Cluster: Stops the local cluster from running, so it's not wasting any CPU cycles but it is leaving all the files on your desk so you can start the local cluster again whenever you want.
- Start Local Cluster: The option is disabled out here as it is already running. You can start if you have stopped it.
- Reset Local Cluster: You can use this option to bring down the local cluster, get everything out of it, reset it, and then start it back up again.
- Manage Local Cluster: This will launch the local cluster on your default browser and you can see what’s happening inside it.
4. Selecting a local cluster
Selecting Manage Local Cluster by double-clicking the icon will you to the dashboard of the local cluster in your default browser. Here it will show the number of Applications and nodes. As we haven’t deployed it won’t show any applications here
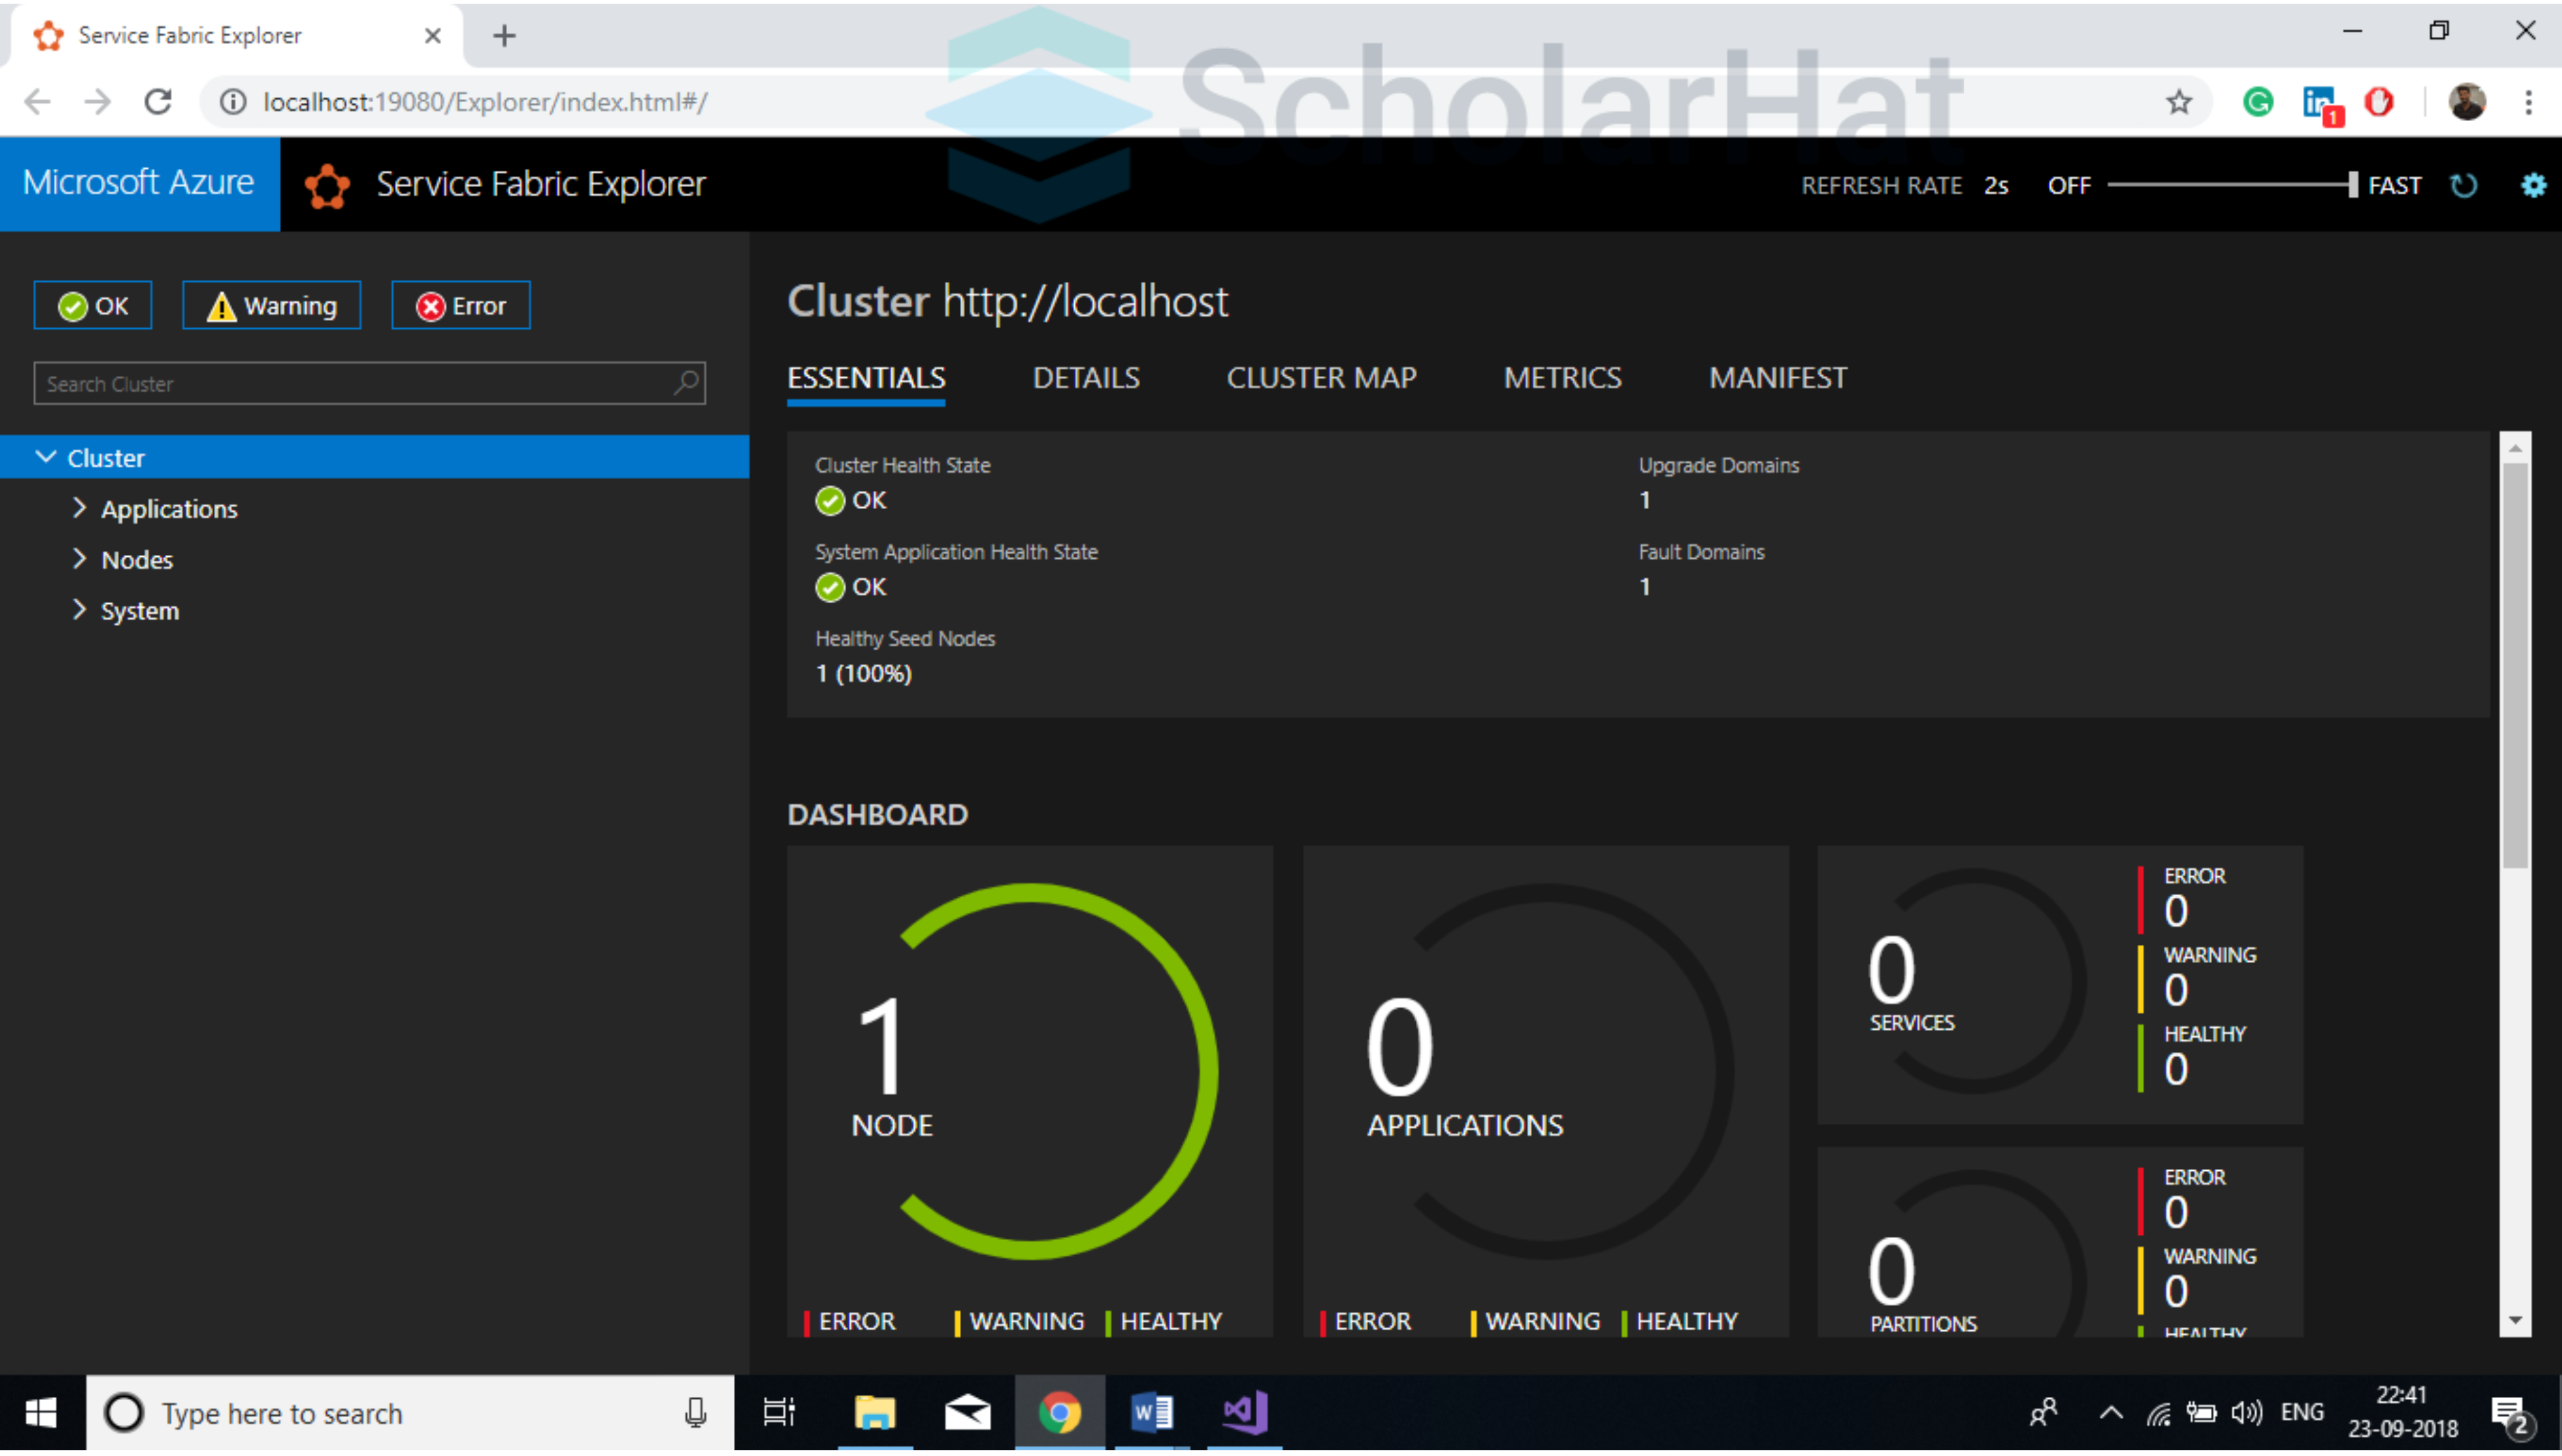
- In the Address Bar, you can see that it is starting off with localhost as your cluster is running on your local machine.
- In case you have a cluster running on an Amazon data center or an Azure data center, the localhost will be replaced with the IP address of that location.
- It is also possible to secure these with certificates making only those client machines having a certificate can communicate with the server.
- Service Fabric uses port 19080 as an endpoint for making REST requests to Service Fabric components within a cluster and the rest of this part of the address is a like a subsection right you can drill into various parts of the cluster.
- The Service Fabric Explorer interface has a refresh rate where it will periodically pull the cluster to get new information.
- You can adjust as per your choice.
- Setting it to fast which has it refreshing every two seconds where you can see what's happening in the cluster as quickly as possible.
Cluster
In the left-hand plane, you can see that the cluster has broken down into three sections:
- 1. Applications: Applications are a kind of software view on what is happening within the cluster while nodes are more like a hardware view which shows you the nodes that are in the cluster.
- 2. Nodes: By default, in the local cluster, you will have only one node which you can change from the context menu. For each node, a separate instance of fabric.exe and fabricateway.exe will be running on your local machine. This is a brand-new cluster that has nothing going on presently.
- 3. System: The System section will show the system services for the cluster. Basically, there will be six, and only four out of six are available on the local cluster and the other two ImageStoreService and UpgradeService only exist in the Azure data center.
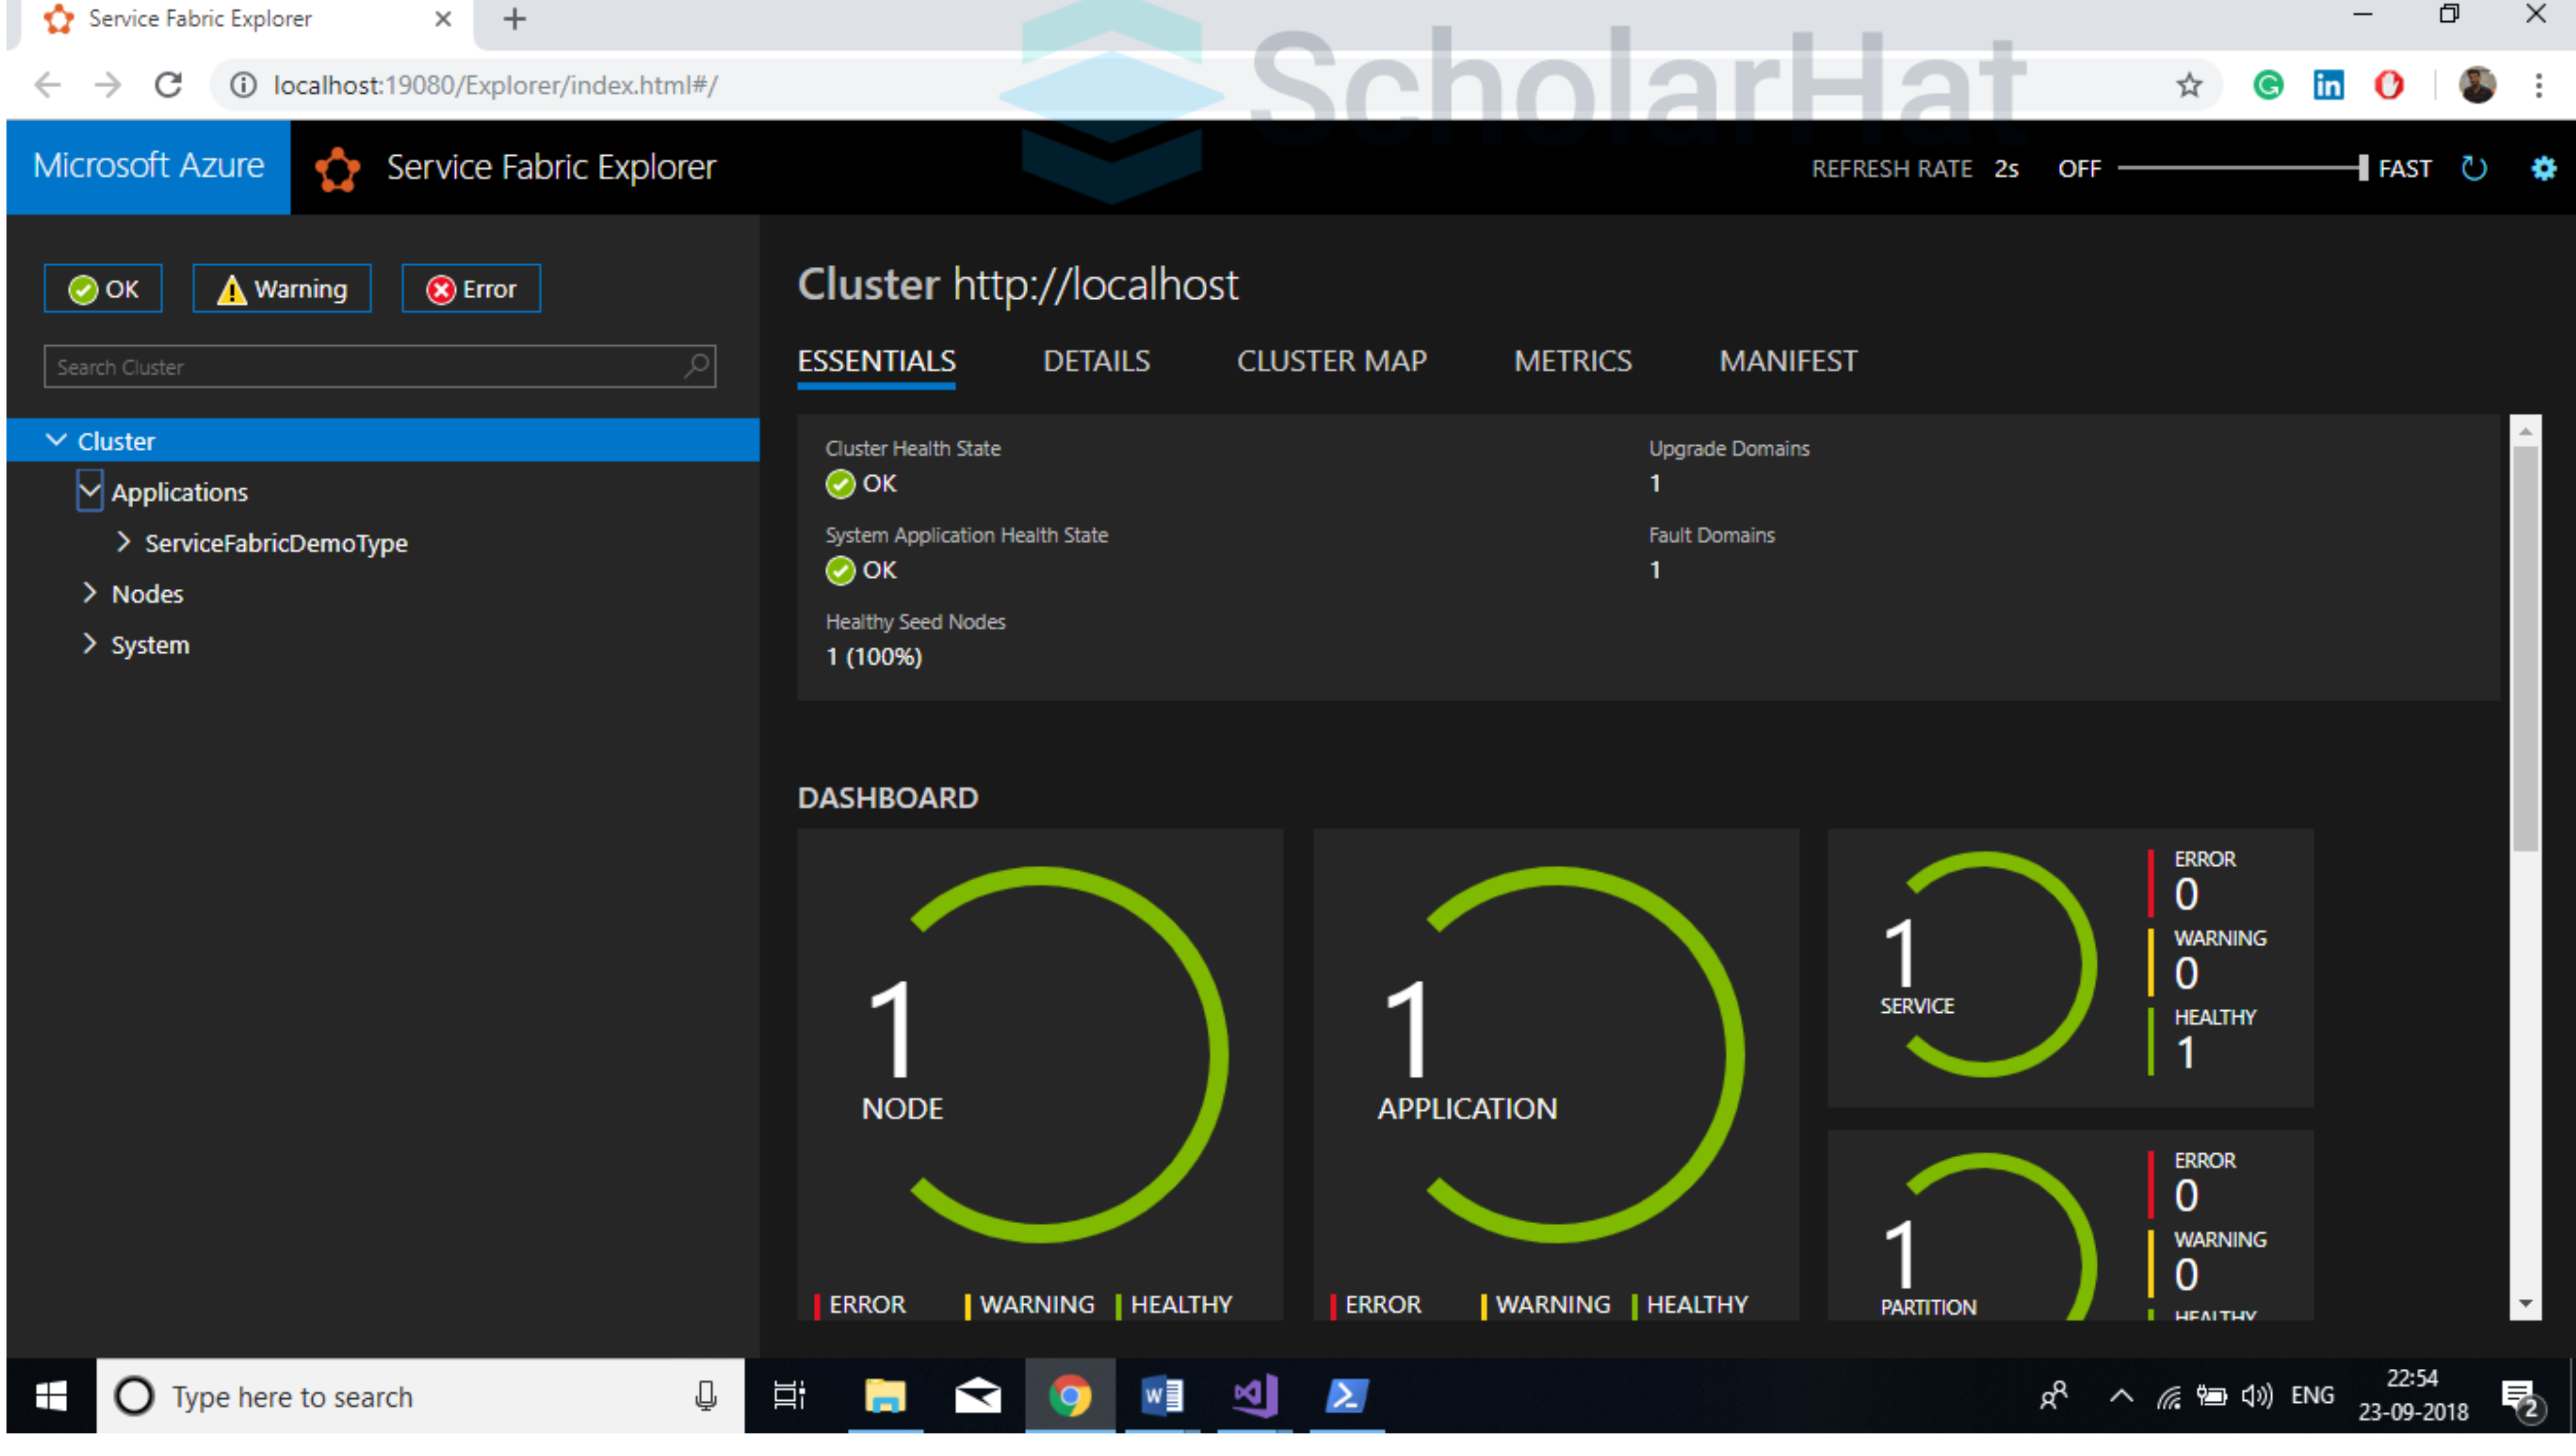
5. Run Application
Run your .NET Core API Application from Visual Studio and you can see the application has updated here.
6. Testing
Testing Microservice Using Postman:
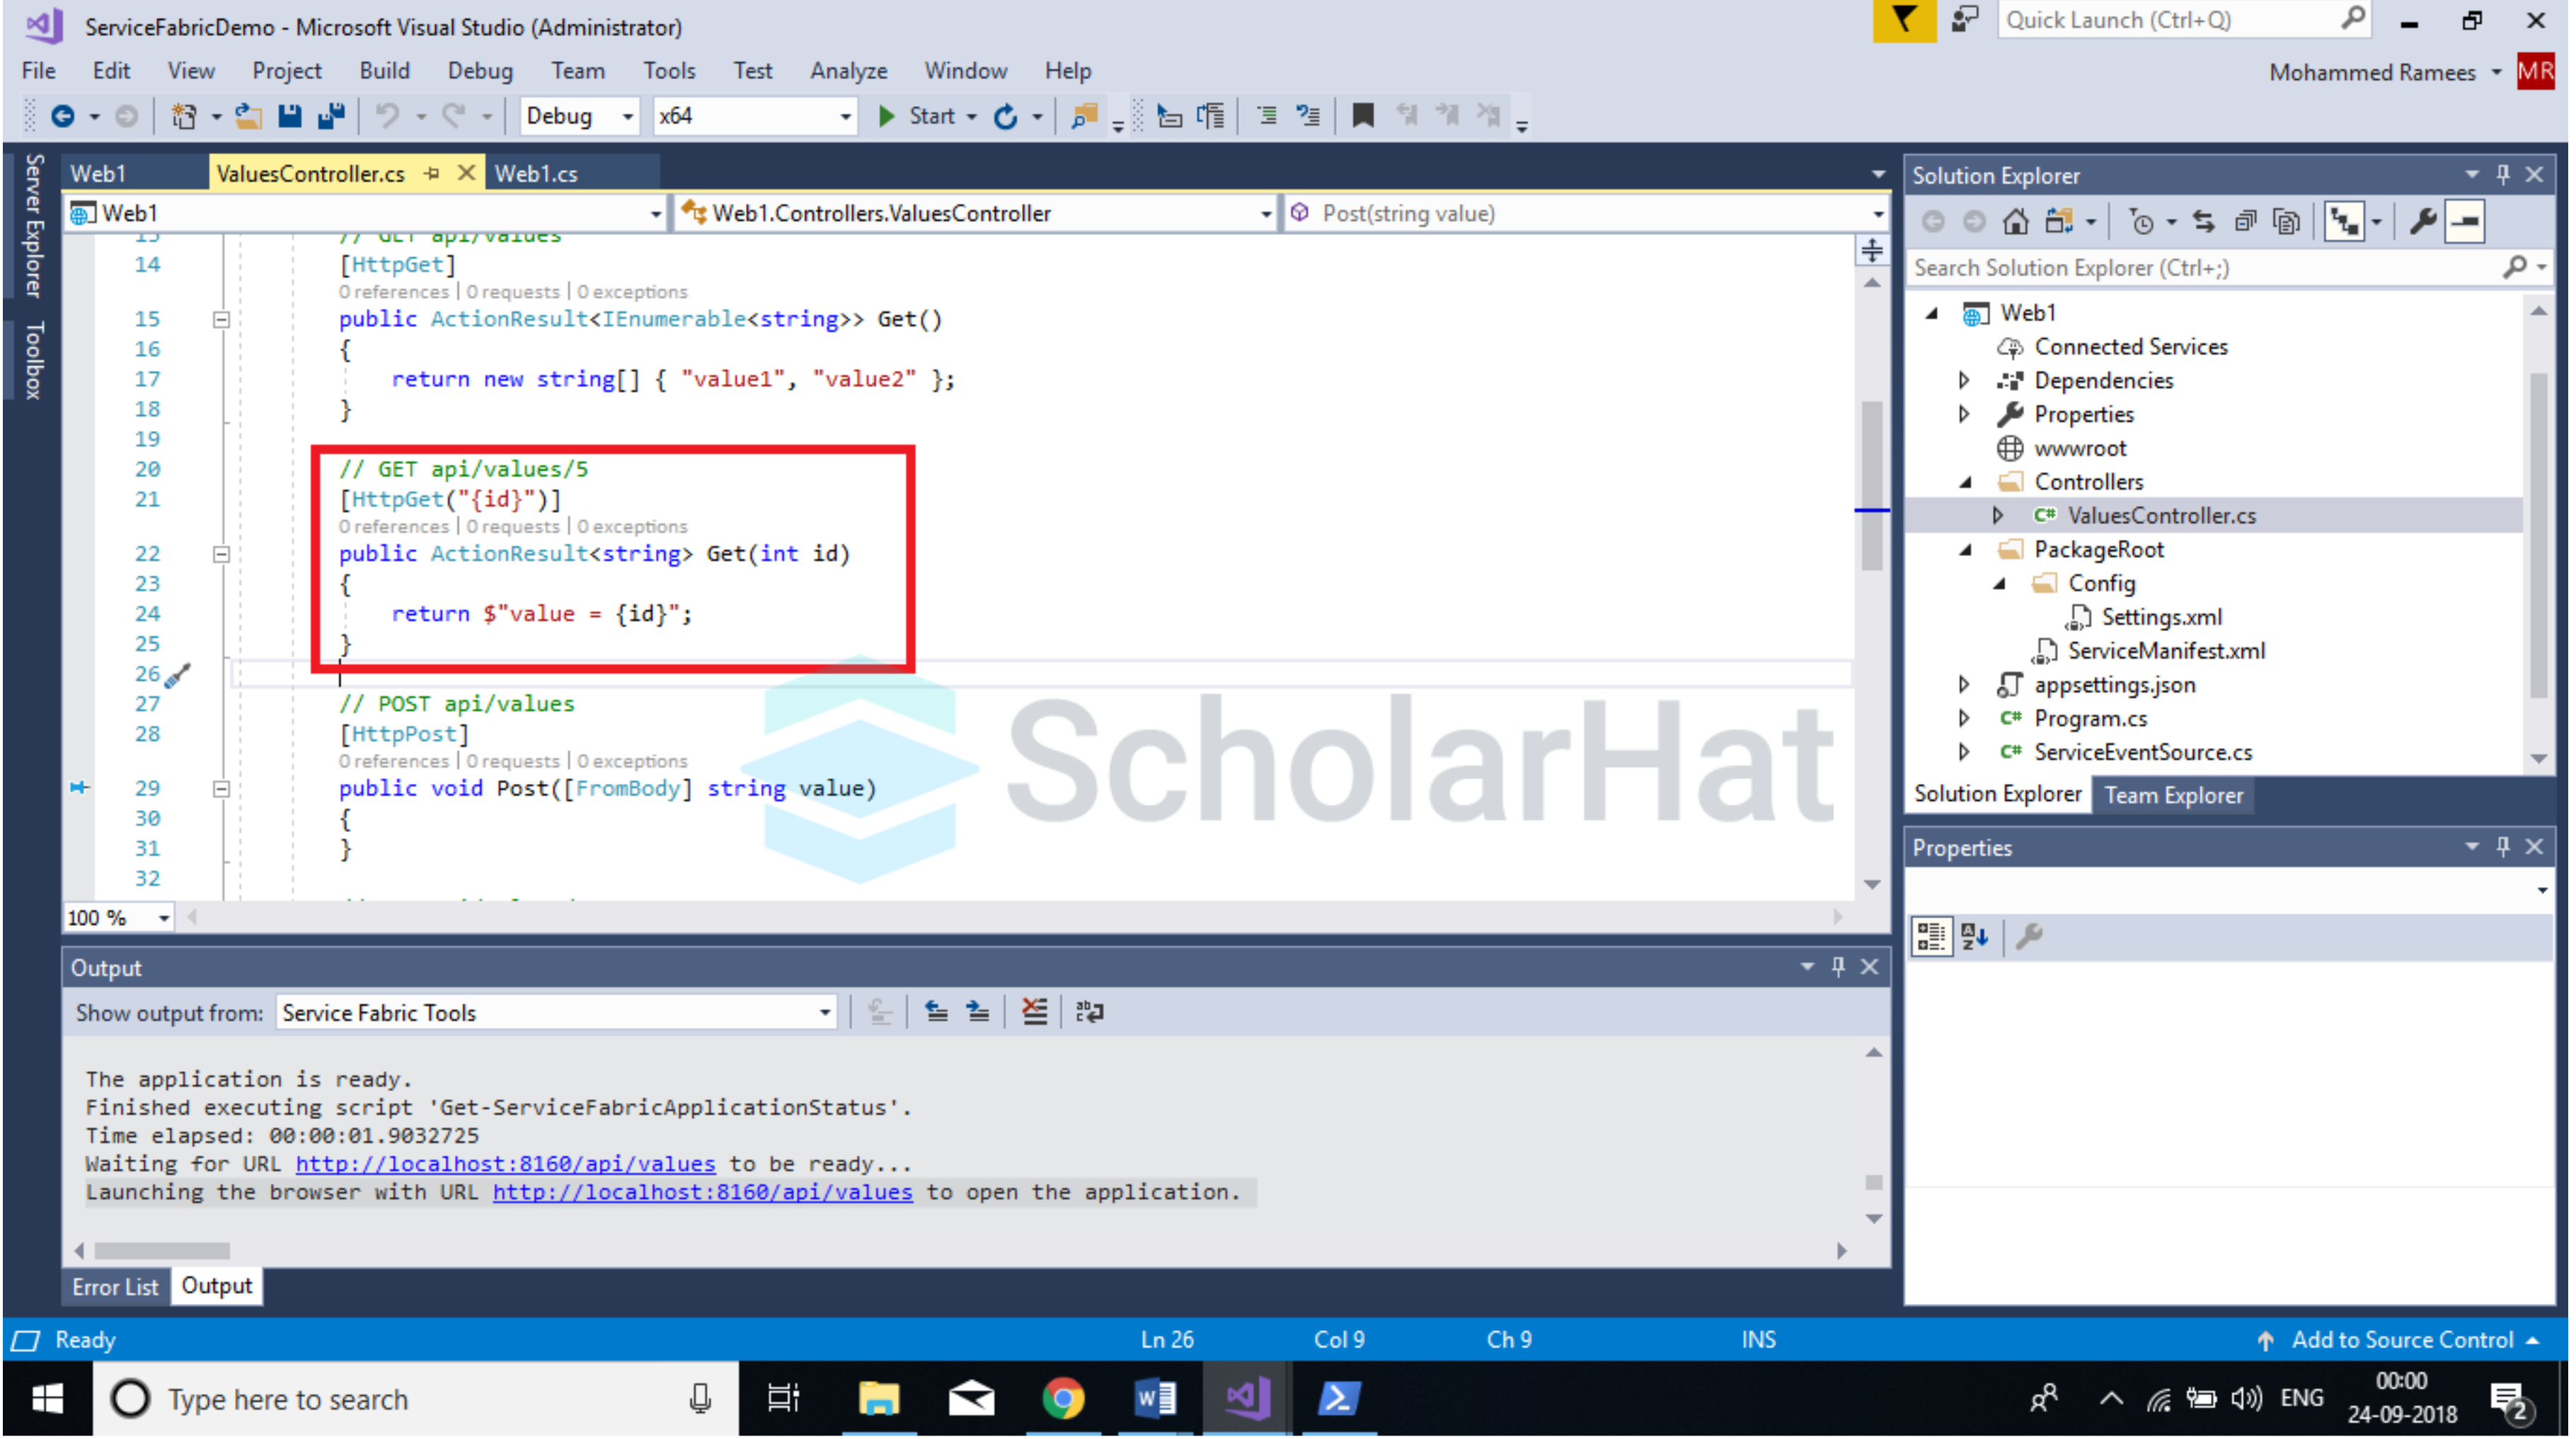
Running the application will also launch the application in the browser with URL below which comes from the ValuesController.cs controller class.

- Let’s update the second method to return a specific value in our controller class to return a value we pass instead of the string “value”.
- Update the code below
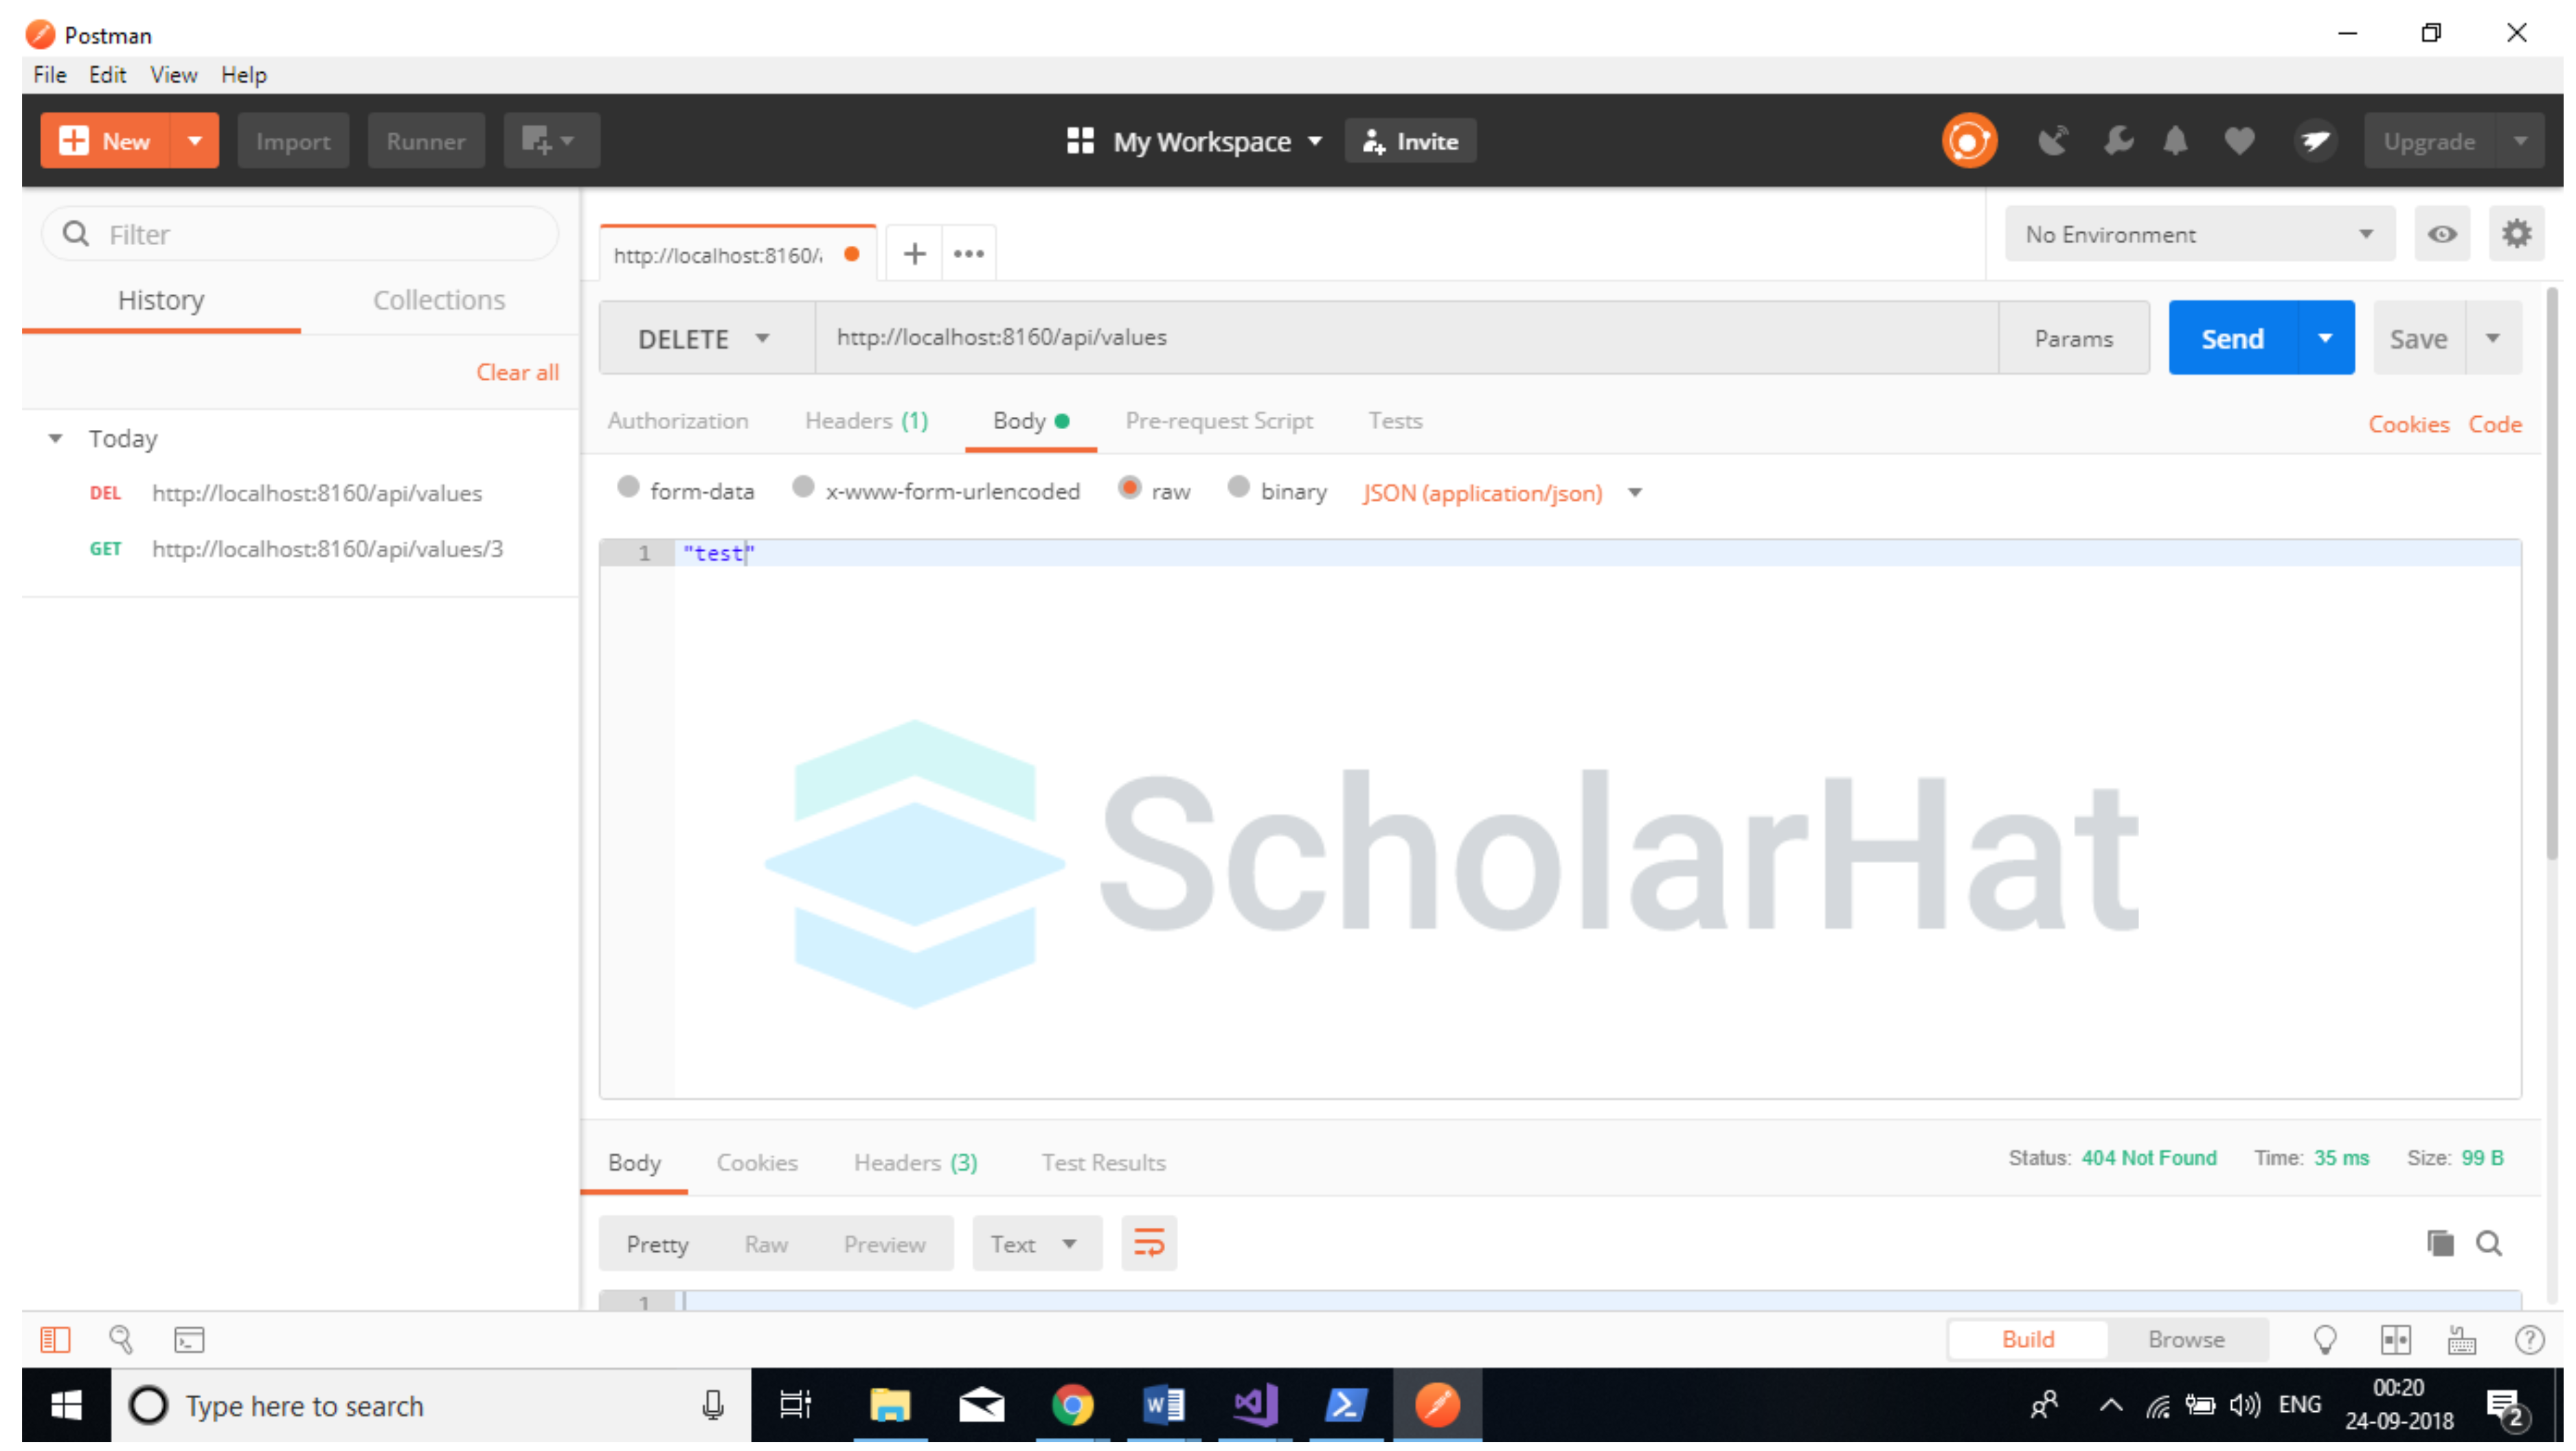
- Here we can update the other action methods also, which are harder to test in the browser as the browser typically takes GET requests and they can only send post requests if we set up a form.
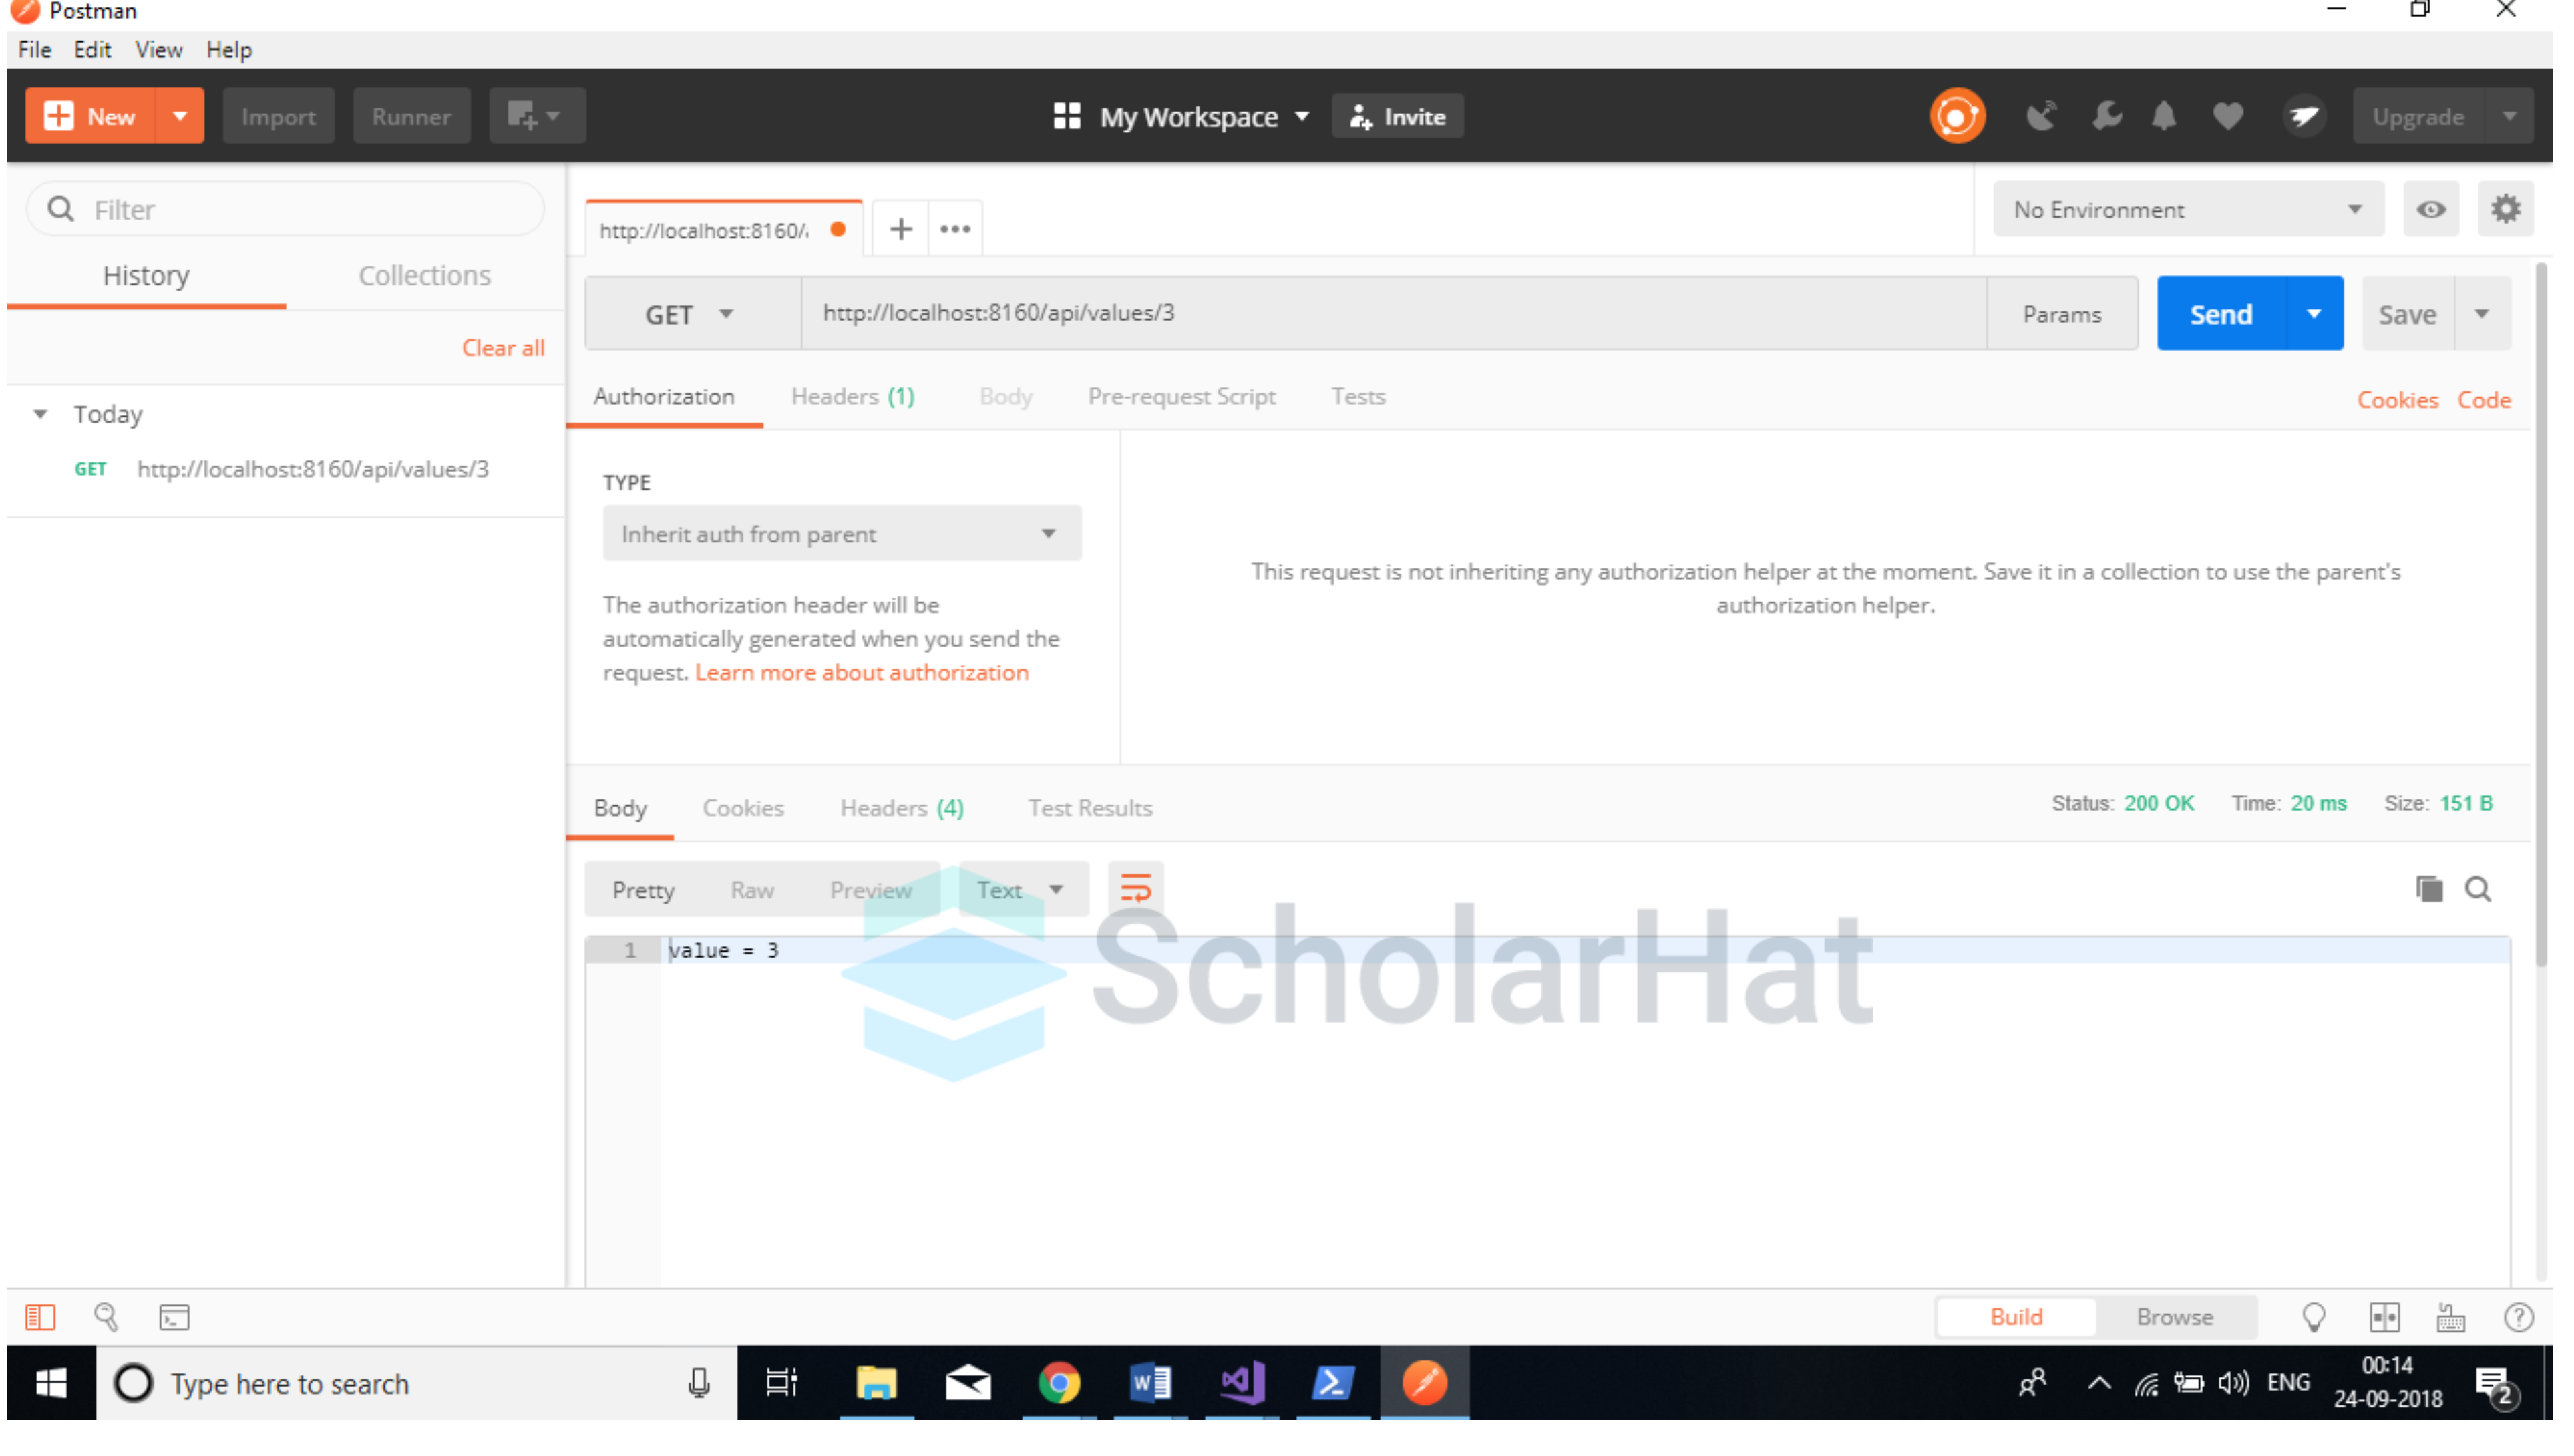
- Instead, we can use a simple tool called Postman for sending HTTP requests to your APIs and you can see how those actions actually work.
- It is a free community tool and you can get it form
https://www.getpostman.com/. - Download and install Postman add the URL appended with the test value and submit a GET request and you can get the result as expected.
- In the same method, you can test for other action methods also by putting breakpoints or writing the action methods.
- For that, you may need to change the body form data to raw JSON data.
Conclusion
So, in this tutorial, we built a Microservice with ASP.NET Core using Azure Service Fabric and tested it using Postman. Your valuable feedback or comments about this article are always welcome.
From designing scalable .NET applications to building cloud-ready Java microservices, boost your career with our expert-led training Java Microservices training and .Net Software Architecture & Design Training.
FAQs
One of the reasons ASP.NET Core is popular among developers is its compatibility with microservices
Ocelot is an open-source API Gateway for . NET designed to work with microservices architectures.
Take our Microservices skill challenge to evaluate yourself!

In less than 5 minutes, with our skill challenge, you can identify your knowledge gaps and strengths in a given skill.